1. Understanding the Types of Backpacking Tents
If you’re planning your next backpacking trip in the U.S., choosing the right tent can make or break your adventure. With so many options out there, it’s easy to get overwhelmed. Let’s break down the main types of backpacking tents—freestanding, semi-freestanding, and trekking pole tents—so you can find what fits your style and the trails you love.
Freestanding Tents
Freestanding tents are by far the most popular choice for American backpackers. These tents have a frame that supports them without needing to be staked out first, which means you can pick up the tent and move it around before settling on your spot. They’re perfect for established campsites, rocky ground, or when you want a quick setup after a long day on the trail.
- Pros: Easy to set up, versatile placement, usually more stable in wind
- Cons: Slightly heavier due to extra poles
Semi-Freestanding Tents
Semi-freestanding tents split the difference between freestanding and non-freestanding models. They need a few stakes to fully hold their shape but have a partial frame to keep things upright. These are great if you want to save some weight but still value ease of use.
- Pros: Lighter than fully freestanding, offers some flexibility in setup
- Cons: Requires staking for full stability, may not work well on solid rock or sand
Trekking Pole Tents
Trekking pole tents ditch traditional tent poles altogether and instead use your hiking poles as the main supports. This makes them incredibly lightweight—a huge bonus for thru-hikers and ultralight fans exploring trails like the Pacific Crest Trail or Appalachian Trail.
- Pros: Ultralight, packs down small, ideal for minimalist hikers
- Cons: Can take practice to pitch correctly, requires trekking poles and good staking ground
Comparison Table: Tent Types at a Glance
| Tent Type | Main Support Structure | Weight Range (lbs) | Best For | Drawbacks |
|---|---|---|---|---|
| Freestanding | Tent Poles (independent structure) | 3–5+ | Campsites with variable terrain, beginners | Slightly heavier, bulkier packed size |
| Semi-Freestanding | Tent Poles + Some Stakes Needed | 2–4+ | Lighter trips, mixed terrain | Needs stakes for best pitch, less flexible on hard ground |
| Trekking Pole Tent | Your Trekking Poles + Stakes | 1–3+ | Ultralight backpackers, long-distance trails | Learning curve for pitching, needs soft ground for stakes |
Which Tent Fits Your Adventure?
If you love classic car camping or weekend hikes in national parks where sites are clear and flat, a freestanding tent might be your best bet. Headed off-trail into rougher country or trying to shave ounces from your pack? A semi-freestanding or trekking pole tent could be just what you need. Think about where you’ll be camping most often—and how much effort you want to put into setting up each night—before making your pick.
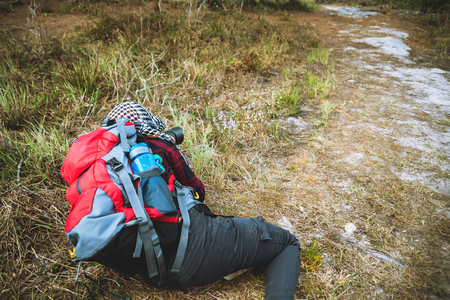
2. Key Features to Look For
Choosing the right backpacking tent can make all the difference on your outdoor adventure. Here’s what you need to know about the essential features that will help you find the perfect tent for any trail in the U.S.
Weight and Packed Size
When you’re logging miles on American trails, every ounce counts. Ultralight tents are a go-to for thru-hikers on the Pacific Crest Trail or Appalachian Trail, while weekend warriors might opt for a slightly heavier but more spacious model. Here’s a quick comparison:
| Tent Type | Average Weight | Packed Size | Best For |
|---|---|---|---|
| Ultralight (1P) | 1-2 lbs | Compact (fits in most packs) | Solo hikers, long distances |
| Lightweight (2P) | 3-4 lbs | Small to medium | Duos, fast & light trips |
| Comfort (2P+) | 5+ lbs | Larger, may need external carry | Shorter hikes, more comfort |
Ventilation and Condensation Control
The weather can change quickly in places like Colorado or Washington. Good ventilation is key to keeping condensation at bay, especially in humid regions. Look for tents with mesh panels, adjustable vents, and double-wall construction so you stay dry and comfortable.
Seasonality: 3-Season vs 4-Season Tents
If you’re trekking through summer heat in Arizona or bracing for chillier nights in the Rockies, make sure your tent matches the conditions. Most backpackers go with 3-season tents—they balance protection from rain and bugs with airflow for warm nights. If you’re planning winter camping or high-altitude trips, a 4-season tent is built to handle snow loads and strong winds.
| Tent Type | Main Use | Weather Protection | Notes |
|---|---|---|---|
| 3-Season Tent | Spring-Fall hiking & backpacking | Rain & mild wind; not for heavy snow | Most popular option in U.S. |
| 4-Season Tent | Winter & alpine use only | Snow, wind, extreme cold | Bigger investment; only if needed |
Build Quality and Durability
A tent is an investment—especially when exploring remote parts of America’s backcountry. Check zippers, seams, poles, and fabrics before you buy. Ripstop nylon or polyester with waterproof coatings (look for high-denier ratings) will stand up to rough terrain and unpredictable weather.
Pole Materials and Setup Ease
Dome-style tents are common for U.S. backpackers because they’re easy to pitch even if it’s getting dark or stormy. Aluminum poles are lightweight yet sturdy, while fiberglass is more budget-friendly but less durable. Color-coded clips and simple designs mean less hassle at camp after a long day on the trail.
![]()
3. Weatherproofing and Durability
When you’re backpacking across America’s diverse trails, weather can change fast—from sudden Rocky Mountain storms to the relentless rain of the Pacific Northwest or the gusty winds in desert landscapes. Picking a tent that stands up to these elements is key for a comfortable and safe adventure. Here’s what you need to know to choose a tent that delivers on weatherproofing and durability.
Key Features for Weather Protection
Tents aren’t all created equal when it comes to handling Mother Nature’s surprises. Look for these essential features:
| Feature | Why It Matters | What to Look For |
|---|---|---|
| Rainfly Coverage | Keeps rain out, prevents leaks | Full-coverage rainfly, extends close to the ground, waterproof coating (look for at least 1500mm rating) |
| Seam Sealing | Stops water from seeping through seams | Factory-taped or welded seams; DIY seam sealant as backup |
| Ventilation | Reduces condensation, keeps air flowing in humid or rainy areas | Mesh panels, adjustable vents, double doors for cross-breeze |
| Pole Strength & Design | Withstands wind and heavy weather | Aluminum poles (stronger than fiberglass), extra guy-out points, dome or geodesic designs for stability |
| Floor Material & Construction | Protects against wet or rocky ground | High-denier fabric, bathtub-style floor (sides curve up), reinforced corners |
Packing for Different Climates Across the U.S.
No two regions are the same, so match your tent’s strengths with your favorite trails:
| Region/Condition | Tent Recommendation | Pro Tip |
|---|---|---|
| Rocky Mountains (cold snaps, snow, wind) | 4-season or sturdy 3-season tent with strong poles and full coverage rainfly | Add extra guy lines for stability during storms |
| Pacific Northwest (constant rain, humidity) | Tent with outstanding waterproofing and excellent ventilation; look for rain gutters on vestibules if possible | Bring a quick-drying microfiber towel for condensation inside the tent |
| Southwest Deserts (heat, sand, high winds) | Tent with lots of mesh for airflow but with a tough floor and low-profile design to shed wind; UV-resistant fabrics help too! | Bury stakes deep or use rocks to anchor tent in sandy soil |
| Southeast (storms, humidity, bugs) | Tent with bug-proof mesh and superior waterproofing; easy setup helps during surprise downpours! | Packing an extra tarp for under your tent adds floor protection from wet ground and roots. |
How to Check a Tent’s Durability Before You Buy:
- Material Quality: Ripstop nylon or polyester fabrics are more resistant to tears.
- Zippers: YKK zippers are known for reliability—no one wants a broken zipper in bad weather!
- Pole Connections: Shock-corded aluminum poles last longer and bend rather than break under stress.
A Quick Gear Shop Checklist:
- Sit inside the demo tent—are seams tight? Is there enough headroom?
- Tug gently on poles and zippers—do they feel sturdy?
- If shopping online, read reviews about performance in real weather conditions.
- Check included warranties—good brands stand behind their tents!
The right tent will keep you dry during downpours in Oregon forests and steady when winds whip across Utah plateaus. Prioritize weatherproofing and durability so every trail feels like home—even when the skies open up.
4. Sizing and Living Comfortably
When youre picking out the perfect backpacking tent, size matters more than you might think. Whether youre heading out solo, with your adventure buddy, or as a group, getting the right fit is key to a good nights sleep and happy trails.
How Many People Will You Be Sharing With?
Tents are typically labeled by capacity (like 1-person, 2-person, etc.), but those numbers can be deceiving. American brands often measure just enough floor space for sleeping pads side by side, so things can get pretty cozy. If you like a little extra elbow room or need space for your gear inside, consider sizing up.
| Group Size | Recommended Tent Capacity | Why? |
|---|---|---|
| Solo Adventurer | 1-person or 2-person | 1-person tents are lightweight, but 2-person gives extra space for gear and comfort. |
| Couple or Duo | 2-person or 3-person | 2-person works for minimalists; 3-person offers room to stretch out or stash packs inside. |
| Three Friends | 3-person or 4-person | 3-person tents fit tight; go bigger if you want more comfort or have bulky gear. |
| Family/Group (4+) | 4-person and up | Larger tents provide communal space but are heavier—consider splitting weight among packs. |
The Importance of Interior Space
A tent isn’t just a place to crash—it’s your home base on the trail. Here’s what to look for to maximize comfort:
- Peak Height: The higher the center point, the easier it is to sit up and change clothes.
- Floor Area: Look at square footage, not just how many people it claims to fit.
- Vestibules & Storage: Vestibules are covered areas outside the main body where you can stash muddy boots and backpacks without crowding your sleeping area.
- Pockets & Loops: Interior pockets keep headlamps, phones, and snacks handy. Gear loops let you hang lanterns or clothes to dry.
Packing Tips from the Trail
- If you’re tall (over 6 feet), check tent lengths—some American models run short for taller hikers!
- Consider double doors for couples—no more crawling over each other for midnight bathroom breaks.
- Taller walls and near-vertical sides make a tent feel more spacious, even if the floor area isn’t huge.
Your Comfort Is Worth It!
No one wants to spend days on the trail feeling cramped or tripping over gear. Take time to match your tent size and layout with your adventure style. A little extra space can make all the difference when weather keeps you inside or after a long day of hiking.
5. Budgeting for Your Tent Purchase
When it comes to picking the perfect backpacking tent, your budget plays a big role. But you don’t have to spend a fortune to get a reliable shelter for the trail. Let’s break down how to balance price, performance, and value—plus when to splurge and where to save.
Price Ranges: What You Get at Each Level
| Price Range | What to Expect | Best For |
|---|---|---|
| $100–$200 | Basic materials, heavier weight, simple features | Beginners, casual trips, budget travelers |
| $200–$400 | Lighter fabrics, better weatherproofing, improved durability | Frequent hikers, longer trails, most backpackers |
| $400+ | Ultralight tech, premium materials, advanced design details | Thru-hikers, ultralight fans, extreme conditions |
Where to Invest and Where to Save
Invest In:
- Weather Protection: A quality rainfly and solid seam sealing keep you dry during storms.
- Pole Quality: Aluminum poles are lighter and stronger than fiberglass—worth paying extra for if you’ll be in rough terrain.
- Packing Weight: If you’ll be hiking long distances or climbing elevation, shaving off tent weight is worth the investment.
You Can Save On:
- Tent Size: Skip extra space unless you really need it; smaller tents are cheaper and lighter.
- Bells & Whistles: Fancy features like multiple doors or gear lofts are nice but not necessary for everyone.
- Brand Names: Well-known brands are great, but lesser-known companies often offer similar quality at lower prices.
Smart Shopping Tips for Backpackers in the U.S.
- Shop Seasonal Sales: Major retailers like REI and Backcountry have annual sales (think Memorial Day or Black Friday) where you can snag deals on top brands.
- Check Out Used Gear: Stores like REI Co-op Used or online platforms like Geartrade offer lightly used tents at big discounts.
- Look for Warranty & Repair Policies: Some American brands offer lifetime warranties or affordable repair services—helpful if you’re investing in a pricier tent.
A Quick Checklist Before You Buy:
- Your usual trail conditions (weather, bugs, terrain)
- Your max pack weight goal
- Your camping style (solo or group)
- Your must-have features vs. nice-to-haves
- Your realistic budget range
The right tent is out there for every hiker—and with a little planning, you’ll find one that fits both your needs and your wallet.