1. Understanding Compass Basics and Types
When venturing into the American backcountry, a reliable compass is one of your most essential navigation tools. Knowing how a compass works—and which type suits your needs—can make all the difference in staying safe and on track. Let’s break down the key components of a compass, how they function, and the main types you’re likely to use while exploring the outdoors in the U.S.
Core Components of a Compass
Every compass has certain basic parts that work together to help you find direction:
| Component | Description |
|---|---|
| Magnetic Needle | This freely rotating needle always points toward magnetic north. |
| Baseplate | The flat, often transparent platform marked with rulers and scales for map reading. |
| Housing (Bezel) | The circular part around the needle, marked with degree markings (0-360°). |
| Direction of Travel Arrow | An arrow on the baseplate showing where to point the compass when navigating. |
| Orienting Lines/Arrow | Inside the bezel, helps align the compass with map grid lines or bearings. |
Main Types of Compasses Used in America’s Outdoors
Different adventures call for different compasses. Here’s a rundown of popular styles you’ll find in packs across U.S. trails and wilderness areas:
| Type | Main Features | Best For |
|---|---|---|
| Baseplate Compass | Flat, clear base; good for map work; includes rulers/scales; light and easy to use. | General hiking, backpacking, orienteering with maps. |
| Lensatic Compass | Flip-open case; sighting wire and lens for precision; durable military design. | Tactical navigation, military use, precise bearings in rugged environments. |
| Sighting Compass (Mirror Compass) | Features a mirror for accurate sighting; helps take precise bearings over long distances. | Backcountry navigation where accuracy is key, search & rescue, mountaineering. |
A Quick Look at How Compasses Work
The magic behind every compass is its magnetic needle. It aligns itself with Earth’s magnetic field—so when you hold your compass level, that needle always points north. By turning the housing and using the direction-of-travel arrow, you can set a course toward any direction you choose. Map features on baseplate compasses make it easier to plot courses and measure distances right alongside your topographic maps—an essential skill for American wilderness adventures.
2. Reading and Using USGS Topographic Maps
Understanding USGS Topo Maps: The Basics
When you’re heading into the American backcountry, a US Geological Survey (USGS) topographic map is one of your most important tools. These maps show much more than roads—they reveal the terrain’s shape, elevation, water sources, trails, and landmarks. Knowing how to read them can make all the difference in staying found and safe.
Key Map Symbols and What They Mean
USGS topo maps use a standard set of symbols and colors to represent features. Here’s a quick guide:
| Symbol/Color | Feature | Description |
|---|---|---|
| Blue lines | Water Features | Streams, rivers, lakes, ponds |
| Brown lines | Contour Lines | Show elevation and land shape |
| Black lines/shapes | Man-made Features | Roads, buildings, trails, boundaries |
| Green shading | Vegetation | Forests or heavy tree cover |
| White areas | No significant vegetation | Bare ground, open fields, rocky areas |
| Purple overlays | Map Revisions | Recent updates to map info (may include new roads or structures) |
Reading Contour Lines Like a Pro
Contour lines are at the heart of topo maps. They connect points of equal elevation and help you visualize hills, valleys, ridges, and depressions. Here’s what you need to know:
- Close contour lines: Steep terrain—think cliffs or sharp hillsides.
- Wide contour lines: Gentle slopes or flat ground.
- Circular lines: Hilltops (concentric circles) or depressions (circles with hachure marks pointing inward).
- Index contours: Thicker contour lines labeled with elevation numbers for quick reference.
Troubleshooting Common Map Features with Compass Bearings
If you want to match what you see on your map to what’s in front of you in the wild, try this step-by-step method:
- Identify your location: Find a known point like a trail junction or river crossing on both the map and real terrain.
- Select a landmark: Pick a visible peak or ridge from where you stand.
- Shoot a bearing: Use your compass to get the direction to that landmark.
- Transfer that bearing: On your map, align the compass edge from your known position along the measured bearing—you’ll draw a line toward your landmark.
- Cross-reference: See if other features along that line match up with reality—this helps confirm your position and keeps you oriented correctly.
The Value of Combining Map and Compass in American Backcountry Travel
Navigating with just a GPS or app isn’t enough when batteries die or signals drop out. Learning to interpret USGS topo maps—and integrating compass bearings with real-world terrain—gives you reliable skills for any adventure in America’s wild places. Whether you’re hiking the Rockies, wandering through Appalachia, or backpacking in the Sierra Nevada, these skills are essential for safety and confidence in the backcountry.
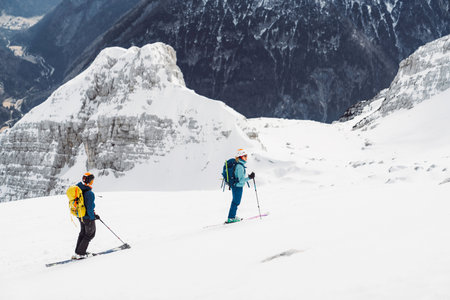
![]()
3. Setting a Bearing and Following a Course
If you want to explore the American backcountry with confidence, mastering how to set a bearing and follow a course with your compass is crucial. Whether youre backpacking in the Rockies, hunting in the Appalachians, or exploring remote forests, these skills help keep you on track when trails disappear or visibility drops. Lets break down the process step by step so you can safely navigate any wild landscape.
How to Set a Bearing
Setting a bearing means deciding which direction you need to travel using your map and compass together. Here’s how to do it:
- Orient Your Map: Lay your map flat and use your compass to align it with true north. This helps match the map’s features with what’s around you.
- Select Your Destination: Pick a point on the map where you want to go—maybe a lake, peak, or trail junction.
- Draw the Line: Place the edge of your compass from your current location to your destination on the map.
- Set the Compass Housing: Rotate the compass dial until the orienting lines are parallel with the north-south grid lines on your map (make sure ‘N’ points to map north).
- Read Your Bearing: The number at the index line (usually marked with an arrow) is your bearing in degrees.
Following a Bearing in the Field
Once you’ve got your bearing, it’s time to put it into action outdoors:
- Hold Your Compass Level: Keep it flat and steady at waist height.
- Align North: Turn yourself (and not just the compass!) until the magnetic needle aligns with ‘N’ on the dial—this is called “putting red in the shed.”
- Select Landmarks: Look up from your compass and choose a distant feature (tree, rock, ridge) that lines up with your direction of travel arrow.
- Walk Toward That Feature: Repeat this process every time you reach your chosen landmark. If obstacles block your path, use leapfrogging: pick new landmarks along your bearing as needed.
Navigating with Field Features
The American wilderness is full of natural navigation aids. Use rivers, ridges, valleys, and even changes in vegetation as reference points. Here’s a quick guide for using field features while following a bearing:
| Feature Type | How to Use It |
|---|---|
| Rivers/Streams | Follow upstream or downstream if they run close to your bearing; use crossings as checkpoints. |
| Ridges/Hills | Crest hills for better views; use ridgelines for travel if they align with your course. |
| Lakes/Meadows | Avoid detours by aiming for visible edges that intersect your bearing. |
| Man-made Trails/Roads | If you hit one, use it as a handrail for easier travel until you reach another checkpoint. |
Common Challenges & Solutions
| Challenge | Solution |
|---|---|
| Poor Visibility (fog/snow) | Pace count between landmarks; stay close to group members; double-check bearings often. |
| Dense Forest/Obstacles | Sight short distances; “leapfrog” with companions; keep returning to original bearing after detours. |
| Bearing Drift Over Distance | Regularly confirm position using secondary features or GPS as backup if available. |
Tips for Real-World Practice
- Practice setting and following bearings in local parks before heading deep into the wild.
- Certain U.S. regions have magnetic declination—always adjust for this using current data for accurate bearings.
- If lost or unsure, stop and reassess before continuing; safety first!
With these techniques, youll be ready to explore America’s great outdoors like a pro—map and compass in hand, confident every step of the way.
4. Managing Declination in the United States
Understanding Magnetic Declination
When navigating in the American backcountry, understanding magnetic declination is crucial for accurate compass use. Magnetic declination is the angle difference between true north (geographic north) and magnetic north (the direction your compass needle points). This difference varies depending on where you are in the United States, and if you ignore it, your navigation could be off by several degrees—sometimes enough to lead you miles off course.
Why Declination Matters in the US
The United States spans a wide range of longitudes, so declination values can vary dramatically from coast to coast. For example, in Seattle, WA, the declination is about +15° East, while in Boston, MA, it’s about -15° West. If you don’t adjust for local declination, especially on longer hikes or when following precise bearings, you risk serious navigational errors.
Sample Declination Values Across the U.S.
| Location | Approximate Declination | Adjustment Direction |
|---|---|---|
| Seattle, WA | +15° East | Add 15° to your compass bearing |
| Denver, CO | 0° (Neutral) | No adjustment needed |
| Boston, MA | -15° West | Subtract 15° from your compass bearing |
| Phoenix, AZ | +10° East | Add 10° to your compass bearing |
| Anchorage, AK | -17° West | Subtract 17° from your compass bearing |
How to Adjust for Declination on Your Compass
- Find Your Local Declination: Use updated maps or online resources like NOAA’s declination calculator. Always check before each trip; declination changes slowly over time.
- Set Your Compass: Many modern compasses allow you to set a fixed declination. Follow the manufacturer’s instructions for setting your local value.
- If Your Compass Doesn’t Have Adjustment: Manually add or subtract the declination value from your map bearing every time you take a reading.
- Stay Consistent: Always apply the same method throughout your trip to avoid confusion and mistakes.
Avoiding Common Navigational Errors in North America
Mistakes with declination have caused hikers to veer far off trail or even get lost entirely. Here are some tips to stay safe:
- Double-check your math: Always confirm whether you need to add or subtract based on east or west declination.
- Practice at home: Try out adjusting for declination before heading into remote areas.
- Use up-to-date maps: Outdated maps might have incorrect declination info—always verify with recent data.
- Know regional patterns: In general, add for eastern US locations and subtract for western regions, but always check specifics!
5. Real-World Compass Problem-Solving
Putting Compass Skills to Work in the American Backcountry
When you’re deep in the American wilderness, knowing how to use your compass isn’t just about theory—it’s about making smart decisions when it matters most. Let’s look at how to apply those skills to some classic backcountry scenarios.
Navigating Off-Trail: Finding Your Way Without a Path
In many US national parks and forests, marked trails aren’t always available. Maybe you’re bushwhacking through the Rockies or exploring remote corners of the Adirondacks. Here’s how to navigate off-trail:
| Step | What To Do |
|---|---|
| 1. Set Your Bearing | Use your map and compass to set a bearing toward your destination. Turn the compass housing until the orienting arrow aligns with north on the map, then follow that bearing. |
| 2. Pick Landmarks | Select a visible feature (like a big tree or rock) along your bearing and walk to it. This keeps you on track without constantly staring at your compass. |
| 3. Repeat & Check | Once you reach your landmark, take another bearing and repeat. Regularly check your position on the map. |
Triangulating Your Position: Pinpointing Where You Are
If you’re unsure of your exact location but can see two or more distant landmarks (like peaks or lakes), triangulation is your friend:
- Identify two (or more) known landmarks on your map that you can also see in real life.
- Point your compass at the first landmark and note the bearing.
- Place the compass edge on the landmark on your map, then rotate the entire compass until its orienting lines point north on the map.
- Draw a line along that bearing.
- Repeat for the second landmark—the spot where the lines cross is your approximate location.
Handling Emergencies When Tech Fails
Batteries die and cell service disappears fast in places like Yosemite or Glacier National Park. Here’s how traditional navigation saves the day:
- If lost: Stop moving. Use features around you (ridges, rivers) to orient yourself with your map and compass.
- If disoriented: Backtrack using bearings you recorded earlier, or use handrails (natural features that guide travel).
- If you must signal for help: Use open areas shown on your map as likely spots for visibility; navigate there with your compass before attempting to flag rescuers.
Quick Reference: Common US Backcountry Problems & Solutions
| Scenario | Compass Solution |
|---|---|
| No trail markers in dense forest | Set a bearing and pace count between checkpoints using visible features |
| Panic after GPS dies | Sit down, review your last known location, reorient with map & compass, plan next steps calmly |
| Caught by sudden fog on a mountain ridge | Shoot bearings to safe zones (tree line or shelter) and navigate carefully using compass and altimeter if possible |
The bottom line: mastering real-world problem-solving with a compass gives you confidence—and an essential safety net—in America’s wildest places.