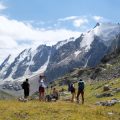
1. Understanding Hydration Needs for Different Hikes
When it comes to hydration in the wild, not all hikes are created equal. Whether you’re heading out for a quick day hike on your local trail or gearing up for a multi-day backpacking adventure through America’s rugged backcountry, understanding your unique hydration requirements is essential. Day hikes typically demand less water, but factors like a scorching summer sun in Joshua Tree or unexpected elevation gain in Colorado’s foothills can change the game quickly. On the flip side, backpacking treks—where you’re carrying everything on your back and covering serious miles—require careful planning for both water access and weight management. Climate plays a huge role: dry desert air will sap your moisture faster than you realize, while humid Appalachian forests might make you sweat more than expected. Terrain matters too—steep climbs and rocky scrambles burn calories and deplete fluids at a faster rate. And let’s not forget elevation: higher altitudes mean drier air and increased respiration, both of which accelerate dehydration. Knowing these variables helps you gauge how much water to bring, when to refill, and what treatment methods to trust. Whether you’re chasing sunrise views on a weekend loop or trekking deep into wilderness for days, matching your hydration plan to your hike type is the first step to staying safe and strong on the trail.
2. Finding Water in the Wild: Sources and Safety
When you’re deep in the American backcountry, reliable water sources can be as vital as your compass. Understanding where to find water—and how its availability shifts with the seasons—is essential for both day hikers and thru-hikers. Let’s explore the most dependable natural sources, their seasonal variability, and some field-tested tips for locating water on the trail.
Reliable Natural Water Sources
| Source Type | Description | Reliability | Considerations |
|---|---|---|---|
| Flowing Streams & Rivers | Fresh, moving water often found along valley floors or descending from high elevations. | High (in spring/summer) | Watch for upstream contamination; may dry up late summer or fall. |
| Lakes & Ponds | Stagnant but generally abundant in alpine basins and lowlands. | Moderate | Risk of algae bloom; avoid near heavy wildlife or campsites. |
| Springs | Groundwater emerging from rocks, usually clear and cold. | Very High (if mapped) | May freeze or slow to a trickle in winter/droughts. |
| Snowfields & Glaciers | Packed snow or ice, melted as needed. | Seasonal (late spring–summer) | Takes time/energy to melt; check for debris or animal tracks. |
| Rainwater Collection | Caught using tarps or rain gear during storms. | Unreliable | Useful in emergency; always filter/boil before drinking. |
Seasonal Availability Across American Landscapes
The U.S. landscape is incredibly diverse, from the lush Pacific Northwest to the arid Southwest deserts. In mountainous regions like the Rockies or Sierras, snowmelt feeds streams and rivers through early summer but can dwindle by late August. In Appalachian forests, springs are fairly consistent year-round, while water tables drop noticeably during droughts. Western desert trails (like sections of the Arizona Trail) may have water caches set by volunteers—always check updated reports before relying on them!
Tips for Locating Water on Trail
- Study Topo Maps: Look for blue lines (streams), blue patches (lakes/ponds), and contour lines indicating valleys where water collects.
- Listen and Look: Moving water can often be heard before it’s seen—pause at quiet overlooks or bends in the trail.
- Aim Low: Water pools in valleys, depressions, and at the base of slopes—descend if searching during dry spells.
- Follow Wildlife: Game trails often lead to water sources; watch for animal tracks converging toward a single direction.
- Check Trail Reports: Use apps like Guthook/FarOut or consult local ranger stations for up-to-date info on source reliability.
- Pace Your Consumption: Always plan your hike around known sources; carry extra if stretches between them are long.
Your Hydration Plan Starts Here
No matter which American landscape you roam—from misty Appalachians to sun-baked Mojave—you’ll need to adapt your hydration strategy based on terrain, season, and recent weather. Stay curious, stay observant, and never gamble with hydration: finding water in the wild is an art that every hiker should master.

3. Water Treatment Methods: Staying Safe
When you’re deep in the wild—whether trekking a day trail in the Rockies or thru-hiking the Appalachian Trail—safe hydration is non-negotiable. American hikers rely on several water purification strategies to fend off bacteria, protozoa, and viruses. Let’s break down the pros and cons of the most popular methods out there.
Filters: The Trail Staple
Pros: Filters are beloved for their speed and ease-of-use. With pump, squeeze, and gravity models available, they physically remove debris, bacteria, and protozoa from streams and lakes—perfect for backcountry sources. Many are lightweight and compact, making them ideal for both ultralight hikers and weekend wanderers.
Cons: Most filters won’t tackle viruses (unless you get a high-end model). They can clog up if you’re sourcing from silty or algae-choked waters. Plus, maintenance is key—forget to clean your filter, and it might fail when you need it most.
Chemical Treatments: Small but Mighty
Pros: Tablets or drops—usually chlorine dioxide or iodine—are ultralight, inexpensive, and pack easily into any kit. They kill a broad spectrum of pathogens, including viruses. For solo hikers or those prioritizing space, chemicals are tough to beat.
Cons: Patience required! Chemical treatments can take 30 minutes to 4 hours depending on water temperature and clarity. Some hikers dislike the taste (especially with iodine), and they don’t remove sediment or floaties—you’ll still want to pre-filter cloudy water.
Boiling: Old-School Reliability
Pros: Boiling is as reliable as it gets—bring your water to a rolling boil for at least one minute (or three at higher elevations), and you’ll wipe out pretty much anything that can make you sick. No fancy gear required; just a stove or campfire.
Cons: Boiling burns time and fuel, which can be precious on multi-day trips. You have to wait for your water to cool before drinking. Also, like chemicals, boiling doesn’t improve taste or remove particles—you might end up sipping on crunchy bits unless you pre-filter.
The Takeaway: Choose Your Method Wisely
Your best option depends on your route, group size, and comfort level. Many American hikers pair methods—for example, filtering first then treating chemically—to cover all bases. No matter your choice, always carry a backup plan; wild water is beautiful but unpredictable.
4. Water Carrying Gear: From Classic Bottles to High-Tech Solutions
When it comes to hydration in the wild, choosing the right water carrying gear can make or break your hiking experience. Across the U.S., both casual day hikers and hardcore backpackers have access to a wide range of options that balance weight, durability, convenience, and innovation. Let’s take a closer look at the most popular and emerging hydration solutions American hikers love, from tried-and-true classics like Nalgene bottles to filter-integrated systems designed for backcountry efficiency.
Classic & Reliable: Nalgene Bottles
Nalgene bottles are a staple on U.S. trails—known for their indestructible build and ease of cleaning. Their wide mouths make filling and adding ice cubes simple, while measurement markings help with meal prep or chemical water treatment. Plus, they fit snugly into pack side pockets and are compatible with most water filters used by American hikers.
Hands-Free Hydration: Bladders & Reservoirs
Hydration bladders (like those from CamelBak or Osprey) have transformed how many Americans stay hydrated during longer hikes. These soft reservoirs slip into dedicated backpack sleeves and use a hose for on-the-go sipping—perfect for keeping your pace up without stopping. However, they do require regular cleaning to avoid mold buildup.
Lightweight & Packable: Collapsible Containers
For those conscious about space and weight, collapsible water containers (such as Platypus or HydraPak) are becoming increasingly popular on U.S. trails. These flexible vessels roll up when empty, making them ideal backup carriers for dry stretches or basecamp use.
All-in-One Tech: Filter-Integrated Systems
The latest innovation is filter-integrated bottles and bladders. Brands like Sawyer and LifeStraw offer products allowing direct filtration as you drink—crucial for areas where water sources are plentiful but untreated. These systems are especially favored by ultralight backpackers tackling America’s big wildernesses.
Quick Comparison of Popular U.S. Hydration Gear
| Gear Type | Main Benefits | Best For |
|---|---|---|
| Nalgene Bottle | Durable, easy to clean, versatile | All-around use; cold weather hikes |
| Hydration Bladder | Hands-free drinking, high capacity | Long-distance hiking; running |
| Collapsible Container | Lightweight, compact when empty | Backup storage; thru-hikes |
| Filter-Integrated System | Treats water as you drink; convenient | Remote areas; ultralight travel |
Selecting Your Solution
Your choice depends on hike length, terrain, available water sources, and personal preference. Many seasoned U.S. hikers carry a combination—for instance, a sturdy bottle for daily use paired with a collapsible backup or integrated filter for emergencies. The evolution of hydration gear in America reflects not just technological progress but also a deep respect for preparedness in the wild.
5. Planning and Strategy: How Much Water to Carry and When to Refill
When you’re out in the wild, hydration isn’t just a health consideration—it’s a survival strategy. Whether you’re hitting a quick afternoon trail or setting off on a multi-day backcountry adventure, knowing how much water to carry and when to refill can make or break your hike. Let’s break down practical strategies for both short and extended treks, so you stay hydrated without weighing yourself down.
Estimating Your Water Needs
A good rule of thumb for day hikes is to carry about half a liter (roughly 17 ounces) of water per hour of moderate activity in temperate conditions. For more strenuous hikes or hotter climates, bump that up to one liter per hour. Multi-day hikers should plan for at least three to four liters per day, accounting for cooking and cleaning needs as well. Always factor in elevation gain, sun exposure, humidity, and your own sweat rate—everyone’s different, so adjust accordingly.
Short Hikes: Keep It Simple
For short trails under five miles or a few hours, pre-hydrate before you hit the trailhead. Bring a lightweight bottle or hydration bladder and sip regularly—don’t wait until you feel thirsty. If there are reliable water sources along the way, pack a compact filter or purification tablets as backup, but often one to two liters will suffice.
Multi-Day Adventures: Think Ahead
Longer trips require more detailed planning. Study your route with an eye for natural water sources like streams, springs, or lakes. Mark their locations on your map or GPS app. Carry enough water to reach each source safely—even if it means hauling extra weight over dry stretches. Use collapsible reservoirs to increase your carrying capacity as needed.
Refilling on the Trail
Never pass up a good refill spot in the wild—especially if you’re unsure when the next one will appear. Top off every chance you get at reliable sources. Make it routine to treat all backcountry water using a filter, purifier, or chemical treatment according to local risks (think Giardia in the Rockies or viruses near popular campsites). If you’re hiking with others, coordinate refills so everyone stays topped off without crowding limited sources.
Stay Flexible and Observant
Weather shifts fast in the mountains; what was a rushing creek on your map might be bone-dry by midsummer. Have backup plans for dry spells: pack extra containers during droughts, know how to ration safely, and always carry emergency purification methods. Trust your senses—if you start feeling sluggish or lightheaded, take a break and rehydrate even if it slows your pace.
Pro Tips for Staying Hydrated
- Sip early and often—don’t chug large amounts at once.
- Add electrolyte tablets on hot days or long climbs.
- Pace yourself; dehydration sneaks up when you’re pushing hard.
Smart hydration is all about balancing preparation with adaptability. With these strategies dialed in, you’ll have the confidence—and the water supply—to explore any trail America throws at you.
6. Leave No Trace: Responsible Water Practices
Hydration in the wild isn’t just about quenching your thirst—it’s about respecting the land and those who come after you. Practicing Leave No Trace (LNT) principles when sourcing, treating, and disposing of water is essential for preserving America’s wild places, whether you’re day hiking in the Blue Ridge or backpacking through the Sierra Nevadas.
Smart Sourcing: Protecting Waterways
Always gather water from established sources, like flowing streams or lakes, at least 200 feet away from campsites and trails. This distance helps keep fragile riparian zones intact and reduces the risk of contaminating water for wildlife and other hikers. If you’re using soap—biodegradable or not—never wash directly in a water source. Instead, carry water away to clean up, ensuring runoff doesn’t enter creeks or ponds.
Proper Disposal: Filtered and Treated Wastewater
After filtering or treating your water, any leftover should be scattered on dry ground far from water sources. This allows soil to naturally filter out impurities before they reach streams or lakes. Avoid dumping anything—especially food particles or chemicals—into natural waterways, as even small amounts can disrupt delicate ecosystems.
Cultural Respect & Community Courtesy
Leave No Trace is about more than just nature; it’s about people too. Be mindful of other hikers’ need for clean water by keeping collection points pristine and avoiding crowding at popular springs or rivers. In some regions, local tribes consider certain waters sacred—always check for posted signs and respect closures or guidelines.
Teaching Others: Lead by Example
If you see someone making a mistake, offer a friendly word about LNT practices. Passing on these habits ensures future generations can enjoy wild landscapes and clear water just as much as we do today.
Every drop counts. By following responsible hydration practices, you’ll help keep America’s wild heart beating strong—for yourself, for fellow adventurers, and for the untamed beauty that draws us all outdoors.