1. Understanding Spring Water Conditions
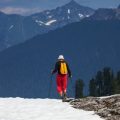
Spring is a beautiful time to explore America’s backcountry, but it also brings unique challenges for hikers and backpackers. As the days get warmer, snow starts to melt in the mountains and seasonal rains become more frequent. These natural events can drastically change water conditions, especially in streams and rivers you may need to cross during your hike.
Why Do Streams Swell in Spring?
The main reason streams and rivers swell during spring is the combination of melting snow (snowmelt) and increased rainfall. In many parts of the United States—like the Rockies, Sierra Nevada, Appalachians, and Cascades—heavy winter snowpack melts quickly when temperatures rise. This rapid melting sends large volumes of water rushing downhill into creeks, streams, and rivers. Add in spring rainstorms, and you’ve got a recipe for fast-rising water levels.
Key Factors Affecting Stream Conditions in Spring
| Factor | How It Affects Streams |
|---|---|
| Snowmelt | Increases stream flow as snow in higher elevations melts rapidly, often peaking late morning to afternoon. |
| Rainfall | Sudden storms can raise water levels quickly, making crossings riskier within hours. |
| Temperature | Warm weather speeds up snowmelt; cooler nights may temporarily slow it down. |
| Geography | Narrow canyons or valleys funnel more water into streams, leading to sudden surges. |
What Does This Mean for Hikers?
If you’re planning a spring hike or backpacking trip in America’s wild places, keep in mind that even familiar trails can look very different. A stream that’s easy to hop across in late summer might be wide, deep, and icy cold in April or May. Fast-moving water can hide slippery rocks or debris just below the surface. Always check local conditions before heading out and be prepared for changing water hazards throughout the day.
2. Preparing for Creek and Stream Crossings
Key Gear Recommendations for Safe Crossings
When you’re hiking in the U.S. during spring, swollen streams and chilly waters are the norm. The right gear can make all the difference. Here’s what you should consider packing:
| Gear | Why It Matters | Pro Tip |
|---|---|---|
| Trekking Poles | Adds stability on slippery rocks and strong currents | Choose adjustable poles with good grip tips |
| Waterproof Footwear/Sandals | Keeps feet dry or dries quickly after crossing | Neoprene socks add warmth in cold water |
| Quick-Dry Clothing | Prevents chafing and keeps you comfortable after a soak | Synthetic fabrics work best; avoid cotton |
| Packed Dry Bag | Keeps electronics and spare clothes safe from splashes or slips | Double-bag essentials just in case! |
| Map & Compass or GPS Device | Helps you find safer alternate crossings if needed | Download offline maps before heading out |
| Emergency Whistle/Signal Device | Essential for alerting others if you get into trouble mid-crossing | Attach to your pack strap for quick access |
Research Strategies Before Hitting the Trail
- Check Recent Trip Reports: Use sites like AllTrails, local hiking forums, or Facebook groups to see current conditions. Spring melt can change things fast!
- Consult Local Ranger Stations: Rangers often know which creeks are running high or have newly washed-out bridges.
- Monitor Weather Forecasts: Sudden rain can cause flash floods even miles upstream—always check before you go.
- Study Topo Maps: Look for wider, braided sections of streams where crossings are usually easier and shallower.
- Avoid High Water Times: Early morning is generally better, as snowmelt intensifies flow by afternoon.
Route Planning Tips for Safer Crossings
- Select Alternate Routes: Identify backup trails that bypass major stream crossings if water levels look dangerous.
- Pace Yourself: Plan your day so youre not rushing—crossing safely takes time and patience.
- Create a Group Strategy: If hiking with others, talk through how youll cross together—buddy up and decide who’ll go first.
- Packing Order Matters: Keep heavier gear low in your pack for better balance while wading through moving water.
- Email Your Itinerary: Let someone know your route and expected return, especially if venturing into remote areas with unpredictable rivers.
Your Springtime Crossing Checklist:
- Trekking poles adjusted and ready?
- Shoes swapped to water-friendly options?
- Packed items secured in dry bags?
- Crew briefed on crossing strategy?
- Laminated map or GPS handy?
- Weather checked within 24 hours?
- Bail-out points planned along your route?
If you prep with the right gear, knowledge, and planning, those wild spring creeks become a manageable part of the adventure—not a showstopper!
3. Safe Crossing Techniques and Best Practices
Step-by-Step Guidance for Assessing Crossing Points
Spring melt and rain can quickly turn streams into challenging obstacles. Before you cross, always take time to assess the situation. Use this checklist to make safer decisions:
| Step | What to Do |
|---|---|
| 1. Survey the Stream | Look upstream and downstream for the safest, shallowest, and slowest spot. Avoid areas with whitewater or deep pools. |
| 2. Check the Riverbed | Pick a crossing point with a solid, stable riverbed—gravel or small rocks are better than slippery boulders or mud. |
| 3. Identify Entry & Exit Points | Make sure you have clear access on both banks, with no steep drop-offs or thick brush blocking your path. |
| 4. Consider Alternatives | If the water looks too fast, deep, or hazardous, look for logs, bridges, or natural crossings—or consider turning back. |
Group Coordination: Safety in Numbers
If youre hiking with others, coordinate your approach before entering the water:
- Communicate: Discuss your plan and signals before starting the crossing.
- Buddies First: Pair up or form a small group for added stability. In North America, linking arms or using a “line” formation is standard practice for strong currents.
- Stagger Crossings: Only one group should cross at a time to avoid crowding and confusion.
- Keep Packs Unbuckled: Loosen straps so you can ditch your pack quickly if needed—this is a key safety tip from U.S. outdoor organizations like the Appalachian Trail Conservancy.
Using Trekking Poles and Improvised Aids
Trekking poles offer extra balance in swift water. If you don’t have them, use a sturdy stick from the bank as an improvised aid. Here’s how:
| Aid Type | How to Use It Safely |
|---|---|
| Trekking Poles (preferred) | Extend both poles for stability; plant one pole upstream while stepping forward with the opposite foot. Move slowly and test each step before shifting your weight. |
| Sturdy Stick (improvised) | Select a pole taller than waist height; plant it firmly upstream as you move. Replace if it feels weak or brittle. |
| No Aid Available | Crouch slightly for a lower center of gravity; shuffle sideways facing upstream to maintain balance. Proceed with extreme caution. |
Extra Tips for North American Conditions
- Shoes On: Keep your boots or trail runners on during crossings—barefoot wading increases your risk of slipping on sharp rocks or debris common in American rivers.
- Avoid Flooded Trails: During spring runoff, never attempt to cross if water levels are rising rapidly or weather conditions are worsening. North American search-and-rescue teams advise waiting until conditions improve or finding another route.
Remember:
The best way to stay safe is to stay alert and work together! Always trust your instincts—if something feels off, dont risk it.
4. What to Do in Emergency Situations
Actions to Take If You Fall In
If you slip and fall into a spring stream or river, stay calm. Panicking uses up energy and can make the situation worse. Follow these steps:
| Action | Details |
|---|---|
| Keep your feet up | Point your toes downstream to avoid getting trapped between rocks. |
| Float on your back | Use your arms to steer and keep your head above water. |
| Look for a safe exit | Scan the shoreline for calm spots where you can get out safely. |
| Don’t stand up too soon | Wait until the water is shallow enough and current is weak before trying to stand. |
Dealing with Swift Currents
Spring melt can cause rivers to run fast and high. Here’s what to do if you’re caught in a strong current:
- Stay downstream of obstacles like logs or rocks; these can trap you underwater.
- If swept away, angle your body at about 45 degrees toward the shore while floating on your back and use your arms to paddle yourself to safety.
- Avoid fighting directly against the current—instead, work with it as you move diagonally toward the bank.
Hypothermia Prevention
Cold spring water quickly saps body heat. To prevent hypothermia:
- Get out of wet clothes as soon as possible after reaching shore.
- Layer up with dry clothing—especially hats and gloves if available.
- Shelter from wind, cover yourself with an emergency blanket, and keep moving if possible to generate body heat.
- If you start shivering uncontrollably, feel confused, or get clumsy, seek help immediately—these are signs of hypothermia setting in.
Self-Rescue Advice (Based on U.S. Search & Rescue Standards)
The basics of self-rescue recommended by American search and rescue professionals include:
- If you’re able, signal for help using a whistle (three short blasts) or waving brightly colored gear.
- Avoid crossing alone—having a buddy means someone can help or call 911 if things go wrong.
- If someone else falls in, do not jump after them. Instead, try to reach them with a stick, rope, or throw bag from shore while calling for help.
- Campsites should be set well above high-water marks to avoid sudden rises overnight.
5. Leave No Trace and Stream Conservation
Why Stream Conservation Matters During Crossings
Spring brings higher water levels, and crossing streams safely is important—but so is protecting the environment. In the U.S., hikers are encouraged to follow Leave No Trace (LNT) principles, which help conserve delicate riverbanks and aquatic habitats. These areas are home to wildlife and plants that can be easily harmed by careless crossings.
Leave No Trace Principles for Stream Crossings
The following LNT principles are especially important when crossing streams:
| LNT Principle | How to Apply at Streams |
|---|---|
| Plan Ahead and Prepare | Choose established crossings or durable surfaces like rocks; avoid muddy banks. |
| Travel and Camp on Durable Surfaces | Step on rocks, gravel, or sand instead of vegetation or soft soil. |
| Dispose of Waste Properly | Pack out all trash; never leave anything behind near water sources. |
| Leave What You Find | Don’t move rocks or disturb plants and animals along the stream. |
Tips for Minimizing Impact While Crossing Streams
- Avoid widening the crossing point—cross in single file if you’re with a group.
- If possible, use existing trails or bridges instead of making new paths.
- Stay off fragile riverbanks to prevent erosion and habitat destruction.
- If banks are muddy or steep, look for alternate crossing points with stable footing.
Remember: Protecting Streams Protects Wildlife
Your careful actions help keep streams clean for fish, frogs, insects, and other creatures that rely on healthy waterways. By practicing these habits every time you cross a stream in spring, you support conservation efforts valued across the U.S.