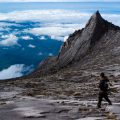
1. Research Your Destination and Trail Options
Planning your first multi-day trek in the U.S. starts with choosing the right destination and trail. With countless national parks, forests, and wilderness areas, narrowing down your options can feel overwhelming. Here’s how to make it easier:
Explore Popular Multi-Day Trekking Routes
The United States is home to some legendary long-distance hiking trails and scenic routes. Depending on your experience level, time frame, and interests, you’ll find a wide range of options. Check out this table for some popular choices:
| Trail Name | Location | Mileage | Highlights |
|---|---|---|---|
| John Muir Trail | California (Sierra Nevada) | 211 miles | Alpine lakes, granite peaks, Yosemite, King’s Canyon |
| Appalachian Trail (Section Hikes) | East Coast (Georgia to Maine) | Choose your section: 30-100+ miles | Green tunnels, mountain views, shelters along the way |
| PCT (Section Hikes) | West Coast (California, Oregon, Washington) | Choose your section: 50-200+ miles | Diverse landscapes from desert to alpine forest |
| Teton Crest Trail | Wyoming (Grand Teton NP) | 40 miles | Spectacular mountain scenery, wildflowers, wildlife |
| Wonderland Trail | Washington (Mount Rainier NP) | 93 miles (loop) | Circumnavigate Mount Rainier, river crossings, wildflowers |
Consider Seasonal Conditions
The time of year you plan to hike will heavily influence where you should go and what conditions you’ll face. For example:
- Summer (June-August): Best for high-elevation routes like the John Muir Trail or Wonderland Trail when snow has melted.
- Spring/Fall: Lower elevation trails or southern routes may be more accessible and less crowded.
- Winter: Mainly suitable for lower elevation treks or desert hikes in places like Arizona or Southern California.
Check Recent Trail Reports and Weather Forecasts
No matter where you go, always check recent trip reports from other hikers and look up the latest weather forecasts before finalizing your plans. Many national parks and trail associations have up-to-date info online.
Check Permit Requirements for Your Chosen Area
A lot of America’s most famous multi-day treks require permits—sometimes months in advance! These rules are in place to protect fragile environments and manage crowds. Here’s a quick look at how permit systems work for a few top destinations:
| Trail/Area | Permit Needed? | How to Get It |
|---|---|---|
| John Muir Trail (Full Route) | Yes (Wilderness Permit) | Lotto system via Recreation.gov; apply 6 months ahead! |
| Teton Crest Trail | Yes (Backcountry Permit) | Teton NP website; reservations open in January for summer season. |
| PCT Section Hikes (>500 miles) | Yes (Long-Distance Permit) | PCTA.org; applications open each fall. |
| Appalachian Trail Section Hikes (<500 miles) | No (most sections), but check for specific park rules. | N/A or park-specific websites for details. |
Your Next Steps:
- Narrow down a few possible trails based on location, difficulty, and season.
- Research recent trail conditions and weather patterns.
- If necessary, apply for permits as early as possible!
This research phase sets the foundation for an awesome multi-day trek—get excited about all the possibilities out there!
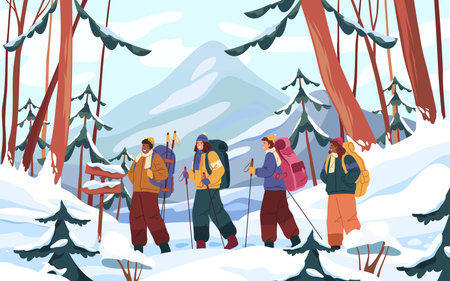
2. Draft a Day-by-Day Breakdown
Once you’ve chosen your trail and gathered the essentials, it’s time to break down your trek into daily chunks. This step makes your adventure manageable and helps you stay on track while out on the trail. Here’s how to create a clear, day-by-day itinerary for your first multi-day hike in the U.S.
Outline Each Day’s Distance and Hiking Time
Start by mapping out how many miles you’ll cover each day. Consider your experience level and fitness—most beginners find 6-10 miles per day comfortable, depending on terrain. Also, estimate how long each segment will take. Average hiking speed is about 2 miles per hour, but this can change with elevation gain or rugged paths.
Sample Daily Itinerary Table
| Day | Distance (miles) | Estimated Hiking Time | Elevation Gain (ft) | Campsite/Accommodation |
|---|---|---|---|---|
| Day 1 | 7 | 4 hours | 1,200 | Pine Creek Campground |
| Day 2 | 8 | 5 hours | 1,500 | Lakeside Shelter |
| Day 3 | 6 | 3.5 hours | 800 | Cedar Ridge Cabin |
| Day 4 | 9 | 5.5 hours | 1,700 | Trailhead Lodge (End Point) |
Add Elevation Details for Each Day
The climb matters as much as the mileage! Note the total elevation gain for each segment so you can mentally and physically prepare. High-gain days may require more breaks and extra snacks.
Select Your Campsites or Accommodations in Advance
If you’re camping, mark established campgrounds or backcountry sites along your route. In some national parks, spots fill up quickly or require reservations—plan ahead. If you prefer a roof over your head, research nearby lodges or cabins that welcome hikers.
Tips for Making Your Daily Plan Work for You:
- Pace yourself: Don’t overcommit—factor in time for lunch, photos, and unexpected delays.
- Backup options: Identify alternative campsites in case weather or fatigue changes your plan.
- Water sources: Mark reliable water spots for refills each day.
- Check regulations: Know rules about fires, camping zones, and permits where you’ll be staying.
This detailed breakdown sets you up for success—when you know what’s coming each day, you can focus on enjoying the journey and soaking in those epic American landscapes!
3. Plan Meals and Resupply Points
Map Out Your Food Strategy
When preparing for your first multi-day trek, planning what you’ll eat is just as important as mapping your route. Think about each meal—breakfast, lunch, dinner, and snacks—for every day on the trail. Lightweight, high-calorie foods like instant oatmeal, energy bars, jerky, and freeze-dried meals are popular choices among American backpackers because they’re easy to pack and prepare. Don’t forget about comfort food or treats like peanut butter or a small piece of chocolate to boost morale after a long day of hiking.
Sample Meal Plan Table
| Day | Breakfast | Lunch | Dinner | Snacks |
|---|---|---|---|---|
| 1 | Instant Oatmeal + Coffee | Tortilla with Peanut Butter & Honey | Freeze-Dried Chili Mac | Trail Mix, Jerky, Energy Bar |
| 2 | Granola + Powdered Milk | Tuna Packet with Crackers | Dehydrated Pasta Primavera | Nuts, Fruit Leather, Cheese Stick |
Identify Water Sources
Staying hydrated is key to staying healthy on the trail. Use your map and guidebook to mark reliable water sources near your route—streams, springs, lakes, or ranger stations. In many parts of the U.S., especially in national parks or wilderness areas, water may not be available at every campsite. Always carry a water filter or purification tablets. Pro tip: Check recent reports or apps like Guthook (FarOut) for updates on seasonal water flow before you go.
Water Source Checklist
- Mark all known water sources on your daily map section.
- Estimate how much water you need between each source (typically 2-4 liters per person per day).
- Add backup options for dry stretches.
Figure Out Resupply Points Along the Trail
If your trek lasts more than a few days, carrying all your food from the start can get heavy fast. Many longer U.S. trails have established resupply points—camp stores, mail drops at post offices, or small towns along the way. Research these ahead of time and plan when you’ll restock on essentials like food and fuel.
Popular Resupply Methods:
- Town Stops: Hike into a nearby town for groceries and a hot meal.
- Mail Drops: Ship a box of supplies to a post office (general delivery) or hostel close to the trail.
- Caches: Some well-traveled routes have volunteer-maintained caches of water or snacks—but never count on these as your only backup!
4. Factor in Safety and Emergency Plans
When planning your first multi-day trek, safety is a top priority. Thinking ahead about emergencies not only helps keep you safe, but also gives peace of mind to friends and family back home. Here’s how to build solid safety measures into your detailed itinerary:
Include Check-In Points
Set regular check-in points along your route. These are locations or times when you’ll send a quick update—via text, call, or a satellite device—to someone back home. This way, if anything goes wrong, people know where you were last and when to expect your next message.
| Check-In Point | Estimated Time | Contact Method |
|---|---|---|
| Trailhead Start | 8:00 AM Day 1 | Text Message |
| Campsite #1 | 5:00 PM Day 1 | Phone Call (if signal) |
| Trail Junction X | 12:00 PM Day 2 | Satellite Messenger |
Add Emergency Contacts
Your itinerary should list emergency contacts for both yourself and local authorities. Share this info with your hiking partners and someone staying at home.
- Local Search and Rescue phone number
- The nearest hospital or ranger station
- Your own emergency contact (family/friend)
Plan Early Exit Routes
No one wants to cut their trek short, but sometimes things happen—like injuries or sudden bad weather. Identify spots along your route where you can leave the trail quickly and safely if needed. Mark these “bail-out” points on your map and include them in your itinerary.
| Bail-Out Point | Mile Marker | Description/Exit Route |
|---|---|---|
| Forest Road Access | Mile 12 | Gravel road leads back to parking lot, 3 miles by foot |
| Lakeside Trailhead | Mile 22 | Main road pickup location, accessible by shuttle (in season) |
Prepare for Wild Weather and Wildlife Encounters
The wilderness can be unpredictable. Always check the latest weather forecast before heading out, and pack gear for rain, cold snaps, or heat waves—even if they’re not expected. For wildlife:
- Carry bear spray where required (especially in the Rockies or Pacific Northwest)
- Store food in bear-proof containers or hang it away from camp in a tree
- Know what to do if you encounter animals like bears, mountain lions, or snakes—local ranger stations often have guides specific to the area
- If storms roll in, seek shelter below tree line and avoid open ridges or exposed areas during lightning
Sample Emergency Kit Checklist:
- First aid kit with personal meds
- Map & compass/GPS device
- Extra food & water filter
- Emergency blanket/shelter
- SAT phone or emergency beacon (especially for remote treks)
- Headlamp with extra batteries
- Laminated copy of your itinerary & contact info
Trekking in America’s great outdoors is an incredible experience—but it’s best enjoyed with a solid plan for safety and emergencies built into your itinerary!
5. Double-Check Gear and Logistics
Before you hit the trail, making sure you have all your gear and logistics squared away can make or break your first multi-day trek. Here’s how to get everything in order so you’re not caught off guard out in the wild.
Make a Comprehensive Gear List
Start by writing out a full checklist of everything you’ll need, from clothing layers to your tent stakes. Don’t just rely on memory—even seasoned hikers forget essentials sometimes. Here’s a sample gear checklist you can use:
| Category | Essential Items |
|---|---|
| Backpacking Basics | Backpack, Trekking Poles, Tent/Shelter, Sleeping Bag, Sleeping Pad |
| Clothing | Moisture-wicking Base Layers, Insulating Jacket, Rain Shell, Hiking Socks, Hat/Gloves |
| Cooking & Food | Stove/Fuel, Lighter/Matches, Cookware, Utensils, Water Filter, Meals/Snacks |
| Navigation | Map, Compass/GPS, Itinerary Copy, Trail Permits (if needed) |
| Safety & First Aid | First Aid Kit, Headlamp, Whistle, Emergency Blanket, Sunscreen/Bug Spray |
| Extras | Camera/Phone, Power Bank, Trash Bags (Leave No Trace), Repair Kit/Duct Tape |
Plan Your Transportation
Your trek isn’t just about what happens on the trail—you also need to think through how you’ll get to and from the starting and ending points. In the U.S., many popular trailheads are far from public transportation or major cities. Ask yourself:
- How will I get to the trailhead? (Personal car? Shuttle? Rideshare?)
- If it’s a point-to-point hike: Will I need a shuttle service or a friend to pick me up at the end?
- Is parking available and safe for overnight stays?
- Are there any fees or permits required for parking?
Confirm Reservations and Permits
Certain U.S. wilderness areas and national parks require advance permits for camping or even day hiking. Be sure to double-check that all your reservations are booked and confirmed before departure. This could include:
- Campsite reservations (especially in busy parks like Yosemite or Grand Canyon)
- Backcountry permits (often limited and must be secured months ahead)
- Lodging before/after your trek if you’re coming from out of town
- Shuttle or transportation bookings if needed
- Bears canisters or other required safety equipment—sometimes these need to be rented in advance!
Trek Logistics Checklist
| Task | Status Check |
|---|---|
| Packed all essential gear? | [ ] Yes [ ] No |
| Transportation planned both ways? | [ ] Yes [ ] No |
| Campsite/backcountry permits confirmed? | [ ] Yes [ ] No |
| Bears canister/reservations made? | [ ] Yes [ ] No |
| Lodging before/after trek reserved? | [ ] Yes [ ] No |
The Bottom Line on Prep Work
A little extra time spent double-checking your gear and logistics can mean smoother trails and fewer surprises. Tick off every box so you can focus on enjoying the adventure!