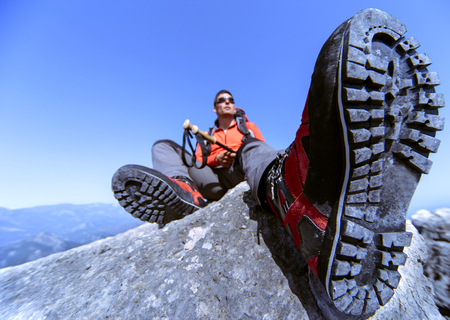
Understanding the Importance of Proper Footwear
When it comes to hiking on America’s diverse trails, your choice of boots and socks can make all the difference between a memorable adventure and an uncomfortable, injury-prone outing. The right footwear isn’t just about style or even basic comfort—it plays a crucial role in protecting your feet, ankles, and legs from common injuries like blisters, sprains, and stress fractures. American trails range from rocky mountain paths to muddy woodland tracks, so having supportive, well-fitted hiking boots paired with moisture-wicking socks helps minimize friction and impact with every step. Investing in proper hiking footwear means you’re not only ensuring your own comfort but also significantly reducing your risk of injury, allowing you to fully enjoy the beauty of the outdoors without worry.
2. Types of Hiking Boots and Their Features
Choosing the right hiking boots is essential for both comfort and injury prevention on the trail. There are several types of hiking boots available in the U.S. market, each designed for different terrains and hiking needs. Understanding these styles and their features will help you select a pair that matches your specific plans, whether you’re headed for a casual day hike or an extended backpacking adventure.
Main Types of Hiking Boots
| Type | Best For | Key Features |
|---|---|---|
| Lightweight Hiking Shoes | Day hikes, well-maintained trails, speed hiking | Low-cut design, flexible soles, lighter weight, less ankle support |
| Mid-Cut Hiking Boots | Moderate trails, uneven terrain, weekend trips | Ankle coverage for support, medium weight, moderate cushioning and protection |
| Backpacking Boots | Multi-day trips, rough terrain, carrying heavy packs | High-cut for maximum ankle support, stiffer midsoles, durable materials, enhanced foot protection |
| Mountaineering Boots | Rugged mountains, snow/ice conditions, technical climbs | Very stiff soles, insulated lining, compatible with crampons, maximum durability and protection |
How to Match Boot Styles with Your Plans
If you’re planning short hikes on easy trails, lightweight hiking shoes may be all you need—they offer comfort without weighing you down. For longer hikes or if you’re prone to ankle injuries, mid-cut boots provide extra support and stability. Backpacking boots are ideal if you’ll be carrying a heavy load or navigating rocky paths; their robust construction helps prevent slips and twists. Mountaineering boots are specialized for extreme conditions and generally aren’t necessary unless your adventures involve snow or technical climbing.
Extra Features to Look For:
- Waterproof membranes: Great for wet climates but may reduce breathability.
- Lug patterns: Deeper lugs offer better grip on mud or loose dirt.
- Cushioning: Extra padding can minimize foot fatigue over long distances.
- Lacing systems: Secure laces help keep your foot stable inside the boot.
A Friendly Tip:
No matter which style you choose, make sure your boots fit well—your toes should have wiggle room but your heel shouldn’t slip. The right pair can make all the difference in keeping your feet comfortable and protected from injury throughout your hike.
3. How to Find the Perfect Fit
Finding hiking boots that fit just right is essential for injury prevention, especially for women whose foot shapes may differ from men’s. Here are some practical tips to help you get it right:
Try Boots on at the Right Time
Your feet naturally swell throughout the day, so it’s best to try on hiking boots in the late afternoon or evening. This helps ensure your boots won’t feel too tight during a long hike.
Wear Your Hiking Socks
Always bring the socks you plan to wear on the trail when trying on boots. The thickness of hiking socks can change how a boot fits, and wearing them during your fitting helps prevent surprises later.
Consider Women’s-Specific Foot Shapes
Women often have narrower heels and higher arches than men. Look for boots specifically designed for women, as these will better match your foot shape and help reduce common issues like heel slippage or pinching across the toes.
Check for Common Fit Issues
- Heel Lift: With your boots laced up, walk around and notice if your heel lifts more than 1/8 inch—this can cause blisters.
- Toe Room: Stand and wiggle your toes; there should be about a thumb’s width of space between your longest toe and the end of the boot. This prevents black toenails and bruising on downhill hikes.
- No Pinching or Pressure Points: Pay attention to any areas that feel tight, especially across the ball of your foot or around your ankle. These can lead to discomfort or injury over time.
Lace Up Properly During Fitting
Lace your boots as you would for hiking. Walk up and down an incline (many outdoor stores offer ramps) to simulate trail conditions. If possible, ask a store associate for help adjusting laces or recommending different styles based on your feedback.
Don’t Rush Your Decision
Take time to walk around in each pair and listen to how your feet feel—not just right away, but after several minutes. A perfect fit now will pay off with happier, healthier feet on every adventure.
4. Choosing the Right Hiking Socks
Picking the perfect hiking socks is just as important as finding the right boots. The right pair will help prevent blisters, wick away moisture, and cushion your feet on rugged American trails. Here’s a guide to help you select socks that keep you comfortable and safe from common foot injuries.
Materials Matter
The material of your hiking socks can make or break your trail experience. Here’s a quick comparison:
| Material | Benefits | Best For |
|---|---|---|
| Merino Wool | Excellent moisture-wicking, odor resistance, soft feel | All seasons, especially variable weather |
| Synthetic (Polyester, Nylon) | Quick-drying, durable, affordable | Wet conditions, summer hikes |
| Cotton | Soft, inexpensive | Not recommended for hiking—holds moisture and causes blisters |
| Blends (Wool/Synthetic) | Balanced performance and comfort | Versatile for most trails and weather |
Sock Thickness: Cushioning & Seasonality
The thickness of your hiking socks affects both comfort and injury prevention:
- Liner Socks: Ultra-thin; worn under thicker socks to reduce friction and blister risk.
- Lightweight: Good for warm-weather hikes or well-cushioned boots.
- Midweight: Versatile; suitable for most three-season hikes in the U.S.
- Heavyweight: Best for cold conditions or carrying heavy backpacks; extra cushioning helps protect against impact injuries.
Sock Heights: Matching Your Boots & Protection Needs
The height of your socks should correspond to your hiking boots for optimal protection:
| Sock Height | Boot Type Match | Main Benefits |
|---|---|---|
| No-show/Ankle | Low-cut trail shoes or sneakers | Minimal coverage, good for short/easy trails in hot weather |
| Crew Length | Mid-cut boots (most popular for U.S. hikers) | Covers ankles, protects from dirt and debris, prevents boot rubbing |
| Knee-high/Over-the-calf | Tall boots or cold/snowy conditions | Maximum coverage and warmth; great for winter hiking or bushwhacking trails with ticks/brushes |
Pro Tip for American Trails:
Avoid cotton socks and always carry an extra pair. Changing into dry socks mid-hike can make a big difference in preventing blisters—especially on longer U.S. trails like the Appalachian or Pacific Crest Trail.
5. Injury Prevention Tips
Break In Your Hiking Boots Properly
Don’t rush your first adventure in new boots! Wear your hiking boots around the house, during errands, or on short neighborhood walks before you hit the trail. This helps soften the materials, lets your feet adjust to the fit, and reduces the risk of blisters or hot spots on longer hikes. Gradually increase the amount of time you spend in them—your feet will thank you later.
Layer Socks for Comfort and Protection
Consider layering a thin, moisture-wicking liner sock underneath a cushioned hiking sock. This combo helps reduce friction, manage sweat, and prevent blisters. Always choose socks made from synthetic blends or merino wool—never cotton, which holds moisture and can lead to chafing. Try on your socks with your boots before your trip to make sure everything fits comfortably without bunching or tightness.
Caring for Your Feet: Before, During, and After Hikes
Before You Hike
Trim your toenails straight across to avoid painful pressure or black toenails on descents. Apply blister prevention tape or balm to common trouble spots (like heels or toes) if you’re prone to rubbing. Make sure your feet are clean and completely dry before putting on socks and boots.
On the Trail
Pace yourself and take breaks to air out your feet—especially if you start to feel any discomfort. If you sense a hotspot forming, stop immediately to address it by adjusting your socks or applying moleskin or blister pads. Carry an extra pair of dry socks in your pack so you can change out if yours get wet.
After Your Hike
Remove your boots and socks as soon as possible to let your feet breathe. Wash and thoroughly dry your feet, checking for any blisters, cuts, or sore spots. Moisturize dry skin to prevent cracking, and give yourself a gentle foot massage—it’s not just pampering, it helps circulation and recovery!
6. When to Replace Your Hiking Boots and Socks
Choosing the right hiking boots and socks is essential for injury prevention, but knowing when to replace them is just as important. Worn-out gear can lead to discomfort, blisters, and even more serious foot and ankle injuries. Here are some signs and tips to help you decide when it’s time to invest in a new pair.
Signs Your Hiking Boots Need Replacing
- Sole Separation or Worn-Out Tread: If the tread on your boots is smooth or the sole is peeling away from the upper part, it’s time for a replacement. Good traction is key for preventing slips and falls on the trail.
- Lack of Support: If your boots feel less stable or you notice your ankles rolling more easily, the internal support may be worn out. This can increase your risk of sprains and injuries.
- Persistent Discomfort: If you experience new aches, hotspots, or blisters despite proper fitting socks, your boots may have lost their cushioning or shape.
- Visible Damage: Cracks in leather or fabric, broken eyelets, or fraying seams all signal that your boots are past their prime.
How Long Do Hiking Boots Last?
The lifespan of hiking boots depends on terrain, frequency of use, and care. On average, well-maintained hiking boots last between 500-1,000 miles. If you hike regularly in rough conditions, check them more frequently for wear and tear.
When to Replace Your Hiking Socks
- Loss of Cushioning: High-quality hiking socks provide padding that absorbs shock and protects against blisters. When this cushioning flattens out, it’s time for a new pair.
- Holes or Thin Spots: Holes or thinning fabric—especially around the heel or toe—means your socks are no longer offering full protection.
- Persistent Odor or Stiffness: Even after washing, if your socks don’t feel fresh or have lost their stretch, they might be harboring bacteria or have degraded fibers.
Pro Tip: Rotate Your Gear
If you hike often, rotating between two pairs of boots and several pairs of socks can help both last longer and give you a backup in case one gets wet or damaged unexpectedly.
Your feet are your foundation on any hike. Regularly checking your gear for these signs ensures every step is comfortable, safe, and enjoyable—so you can keep exploring with confidence!