1. Planning Your Group Backpacking Trip
Selecting the Perfect Destination
The United States is home to an amazing variety of backpacking trails, from the iconic John Muir Trail in California to the rugged White Mountains in New Hampshire. When choosing a destination for your group trek, consider factors like each person’s experience level, travel distance, and preferred scenery. National parks and established wilderness areas often offer well-marked routes and reliable information about trail conditions.
Popular U.S. Multi-Day Trekking Destinations
| Trail Name | Location | Difficulty | Best Season |
|---|---|---|---|
| John Muir Trail | California (Sierra Nevada) | Challenging | July–September |
| Appalachian Trail (Section Hikes) | East Coast (Georgia to Maine) | Moderate–Difficult | April–October |
| Wonderland Trail | Washington (Mt. Rainier NP) | Strenuous | July–September |
| Teton Crest Trail | Wyoming (Grand Teton NP) | Moderate–Strenuous | July–September |
| Zion Traverse | Utah (Zion NP) | Challenging | April–June, Sept–Oct |
Creating a Group-Friendly Itinerary
A successful group trek starts with a solid plan. Build your itinerary around the slowest or least experienced hiker—this ensures no one feels left behind. Consider daily mileage, elevation gain, water sources, and potential campsites. If anyone in your crew has special needs or goals, be sure to factor those in too. Here’s a quick checklist:
- Daily Mileage: 6–10 miles per day works for most groups new to multi-day hiking.
- Campsite Selection: Reserve backcountry sites if required; check for water access and bear storage requirements.
- Pace & Breaks: Plan regular rest stops and allow time for photos or side trips.
- Duties: Assign roles like navigator, cook, and first aid lead before you hit the trail.
Navigating Permits and Regulations
Many popular U.S. backpacking destinations require advance permits—especially in national parks and wilderness areas. Permit systems can fill up months ahead, so mark application dates on your calendar. In some places, group sizes are limited to protect fragile environments; always check local rules before finalizing your plans.
Permit Tips Table
| Area/Trail Type | Permit Needed? | How to Apply |
|---|---|---|
| National Parks (e.g., Yosemite, Grand Canyon) | Yes (Backcountry Permit) | NPS.gov or park office; online lottery system for popular trails. |
| Bureau of Land Management Areas (e.g., Paria Canyon) | Yes (Wilderness Permit) | Bureau website; advance reservation needed. |
| National Forests/State Parks | Varies by location/trailhead size. | Check forest or park website for details. |
| Shelter-to-Shelter Trails (e.g., Appalachian Trail sections) | No permit for many sections; some exceptions apply. | N/A or check with local trail clubs. |
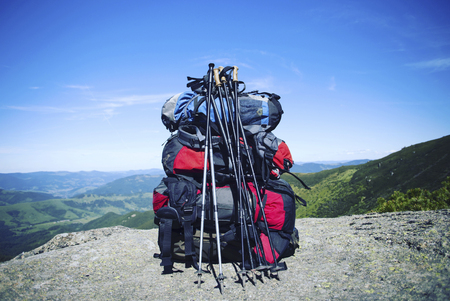
Packing for Safety and Comfort
Your group’s safety comes first. Make sure everyone has the Ten Essentials: navigation tools, sun protection, insulation layers, headlamp/flashlight, first-aid kit, fire starter, repair kit/tools, food, hydration system, and emergency shelter. Double-check that someone carries a map and compass—even if you rely on GPS apps—and know how to use them in the backcountry.
The Ten Essentials Checklist Table
| # | Essential Item |
|---|---|
| 1 | Navigation (map/compass/GPS) |
| 2 | Sun Protection (hat/sunscreen/sunglasses) |
| 3 | Insulation (jacket/warm layer/rain gear) |
| 4 | Headlamp or Flashlight (with spare batteries) |
| 5 | First Aid Kit (plus personal medications) |
| 6 | Fire Starter (matches/lighter/fire steel) |
| 7 | Repair Kit & Tools (multi-tool/tape/cordage) |
| 8 | Sufficient Food (extra snacks/meals) |
| 9 | Sufficient Water & Water Treatment System |
| 10 | Shelter (tent/tarp/bivy as backup even when using huts/shelters) |
The Leave No Trace Principles: Respecting the Outdoors Together
The U.S. outdoor community takes Leave No Trace seriously to protect wild spaces for future generations. Teach everyone in your group these seven principles before you go:
- ❶ Plan Ahead and Prepare: Research weather, regulations, and terrain;
- ❷ Travel & Camp on Durable Surfaces: Use established trails/campsites;
- ❸ Dispose of Waste Properly: Pack out all trash—including TP;
- ❹ Leave What You Find: Don’t take rocks/flowers/artifacts;
- ❺ Minimize Campfire Impact: Use stoves where possible;
- ❻ Respect Wildlife: Observe from a distance and store food securely;
- ❼ Be Considerate of Other Visitors: Keep noise down and yield the trail when needed.
;
;
;
;
;
;
A little extra planning goes a long way when you’re heading into America’s wild places with friends or family! Get these basics right up front so your group backpacking adventure starts off strong—and stays fun for everyone.
2. Gearing Up: Essential Equipment and Food Strategies
Coordinating Gear Sharing for Group Efficiency
When you’re backpacking with a group, smart gear sharing can lighten everyone’s load and make the trek more enjoyable. Instead of every hiker carrying their own stove, water filter, or tent, divide up communal items so each person takes responsibility for different essentials. Before the trip, create a shared checklist and assign items based on pack space, personal preferences, and experience level.
| Shared Item | Suggested Quantity | Who Carries? |
|---|---|---|
| Tent (2-3 person) | 1 per 2-3 people | Strongest hikers or rotate daily |
| Stove & Fuel | 1 per 3-4 people | Gear junkie or most experienced cook |
| Water Filter/Purifier | 1-2 per group | Whoever has extra space |
| First Aid Kit | 1 per group | Trip leader or medical pro in group |
| Bearing Tools (map/compass/GPS) | 1 set per group + backup map/compass | Navigation-savvy member(s) |
Meal Planning: Keeping Everyone Fueled and Happy
Group meal planning means fewer stoves, less fuel, and easier cleanup. Start by checking dietary restrictions and preferences. Decide if you’ll cook together or individually—communal meals are social and efficient, but some folks may want to pack their own food for convenience or dietary needs.
Tips for Effective Meal Planning:
- Create a Group Menu: Plan simple breakfasts (like oatmeal), easy lunches (wraps or trail mix), and hearty dinners (freeze-dried meals or pasta).
- Assign Cooking Duties: Rotate cooking and cleanup tasks to keep things fair.
- Potion Ingredients: Buy in bulk to save money and split portions before the trip.
- Packing Snacks: Encourage everyone to bring their favorite bars or treats for energy boosts during the day.
| Meal Type | Examples | Packed By |
|---|---|---|
| Breakfast | Oatmeal packets, instant coffee, dried fruit | Cooks of the day |
| Lunch/Snacks | Tortillas, nut butter, jerky, trail mix, cheese sticks | Each person packs their own favorites plus shared snacks |
| Dinner | Pasta sides, instant rice & beans, freeze-dried meals, soup mixes | Cooks of the day with pre-trip prep help from all members |
| Dessert/Treats | S’mores fixings, chocolate bars, cookies | Treat lover of the group! |
Packing Light Without Leaving Essentials Behind
The key to a successful group backpacking trip is packing light—but not at the expense of safety or comfort. Encourage everyone to follow a “must-have” list and leave behind luxury extras. Share what you can (see above), and use lightweight gear when possible. Double-check that each hiker has their own basics: sleeping bag, pad, clothes (including rain gear), headlamp, and personal hygiene items.
Packing Checklist: Personal Essentials vs. Group Gear
| Personal Gear (Everyone Packs) | Group Gear (Shared) |
|---|---|
| – Backpack – Sleeping bag & pad – Clothing layers – Rain jacket – Headlamp – Personal meds – Hygiene kit – Water bottle/bladder – Bowl/spoon/cup – Emergency whistle |
– Tent(s) – Stove & fuel – Water filter/purifier – First aid kit – Map & compass/GPS – Trowel & TP kit – Group food supplies |
Lighter Packs Mean Happier Trails!
Aim for packs that weigh no more than 20-25% of each person’s body weight. Do a pre-trip shakedown as a team—lay out all gear together and weed out duplicates or unnecessary items. With good planning and teamwork, your group will be ready for anything the trail throws your way!
3. Team Dynamics and Leadership in the Backcountry
Clear Group Communication
Good communication is the backbone of any successful group backpacking trip. Whether youre hiking through the Rockies or exploring the Pacific Crest Trail, everyone needs to be on the same page. Hold a quick team meeting each morning to go over the day’s plan, weather updates, and trail conditions. Encourage everyone to share their thoughts and concerns—no question is too small when you’re miles from the nearest road. Use radios or walkie-talkies if cell service is spotty, and establish basic hand signals for situations where verbal communication isn’t possible.
Assigning Trail Roles
Dividing responsibilities helps keep the group organized and ensures no one feels overwhelmed. Here’s a simple table you can use to delegate common trail roles:
| Role | Main Duties |
|---|---|
| Leader/Navigator | Guides the group, keeps track of route, sets pace |
| Sweep | Hikes at the back to make sure nobody falls behind |
| Gear Manager | Keeps an eye on shared equipment, checks packs before departure |
| Cook/Kitchen Crew | Prepares meals, manages food storage and cleanup |
| First Aid Lead | Carries first aid kit, monitors group health, handles minor injuries |
You can rotate these roles daily to keep things fair and help everyone build new skills.
Conflict Resolution on the Trail
Tensions can flare when people are tired, hungry, or stressed. If issues pop up, address them early with a calm attitude. Use “I” statements (like “I feel concerned about our pace”) instead of blaming others. Take a break if needed—sometimes just five minutes off your feet can cool things down. Encourage open discussion but also set boundaries so everyone feels heard without arguments dragging on.
Fostering a Positive, Inclusive Trek Culture
A fun group trek is about more than just reaching your destination; it’s about building memories together. Celebrate small wins like reaching a scenic overlook or setting up camp before dark. Make space for everyone’s ideas—whether it’s choosing lunch spots or planning side hikes. Respect personal limits and pace differences; remember, it’s not a race. At night, gather around for stories or games to boost morale and create lasting bonds.
4. Trail Safety and Risk Management
Spotting Hazards on the Trail
Safety should always be your top priority during group backpacking adventures in the U.S. Recognizing potential hazards helps keep everyone safe and the trip enjoyable. Common hazards include wildlife encounters, unstable terrain, river crossings, and exposure to extreme weather. Before heading out, review your planned route for any known risks—trail websites like AllTrails or local ranger stations are great resources for up-to-date info.
Common Hazards Checklist
| Hazard | What to Watch For | How to Manage |
|---|---|---|
| Wildlife (Bears, Snakes) | Tracks, droppings, or sightings | Make noise, store food properly, carry bear spray where required |
| Unstable Terrain | Loose rocks, steep slopes, muddy paths | Wear sturdy boots, use trekking poles, go slow in tricky areas |
| River Crossings | Fast water, slippery rocks | Cross at wide/shallow points, unbuckle pack straps before crossing |
| Weather Changes | Dark clouds, sudden drops in temperature | Check forecasts often, carry extra layers and rain gear |
First Aid Preparation for Groups
Packing a comprehensive first aid kit is a must for multi-day treks. In the U.S., it’s common to assign one or two group members as designated first aid leads—ideally someone with recent Wilderness First Aid (WFA) certification. Everyone should know where the kit is kept and how to use basic supplies. Include medications for allergies (like EpiPens), blister treatments, bandages, antiseptics, and splints.
First Aid Essentials Table
| Item | Purpose | U.S. Tip |
|---|---|---|
| EpiPen/Antihistamines | Treat severe allergic reactions (common in U.S. due to bee stings) | Know who has allergies; keep EpiPens accessible at all times |
| Moleskin/Blister Pads | Treat blisters from long hikes or new boots | Socks change regularly; treat hot spots early to prevent blisters |
| SAM Splint/Triangular Bandage | Treat sprains or fractures until help arrives | Practice splinting techniques before your trip starts! |
| Tweezers/Tick Remover Tool | Remove ticks (especially in U.S. forests) | Check daily for ticks after hiking through brushy areas |
| Pain Relievers/Personal Meds | Treat minor aches and pains; manage chronic conditions | Cary enough for extra days in case of delays |
Staying Weather Aware on U.S. Trails
The weather can change fast in many American wilderness areas—especially in mountains or deserts. Always check the forecast on sites like the National Weather Service before you leave and monitor it with a smartphone if you have cell coverage. In remote areas, consider bringing a NOAA weather radio or a satellite communicator that provides weather updates.
Key Weather Tips:
- If thunder roars, head indoors—or at least below treeline—to avoid lightning risk.
- Avoid crossing rivers after heavy rainfall; flash floods happen quickly.
- Packing layers lets you adapt to temperature swings common on U.S. trails.
Using U.S.-Based Emergency Protocols & Technology
If an emergency happens on the trail, knowing what to do saves lives. In America’s backcountry:
- If you have cell service, dial 911. Be ready to share your exact location using GPS coordinates if possible.
- No signal? Carry a personal locator beacon (PLB) or satellite messenger (like Garmin inReach or SPOT). These devices can send an SOS with your location directly to search-and-rescue teams.
- If you need help but its not a life-or-death emergency (like a twisted ankle), use your device’s messaging function to update friends or rangers.
Main U.S. Emergency Tools Table:
| Device/Method | Best Use | Description |
|---|---|---|
| Cell Phone | Civilized areas/trails with coverage | Dials 911; use mapping apps for sharing GPS location |
| SAT Messenger (Garmin inReach/SPOT) | No cell service/wilderness areas | Sends SOS signal + messages via satellite network |
| NOAA Weather Radio | No phone/satellite needed; weather updates only | Picks up local weather alerts broadcast by National Weather Service |
Your Groups Emergency Plan:
- Create an emergency contact sheet before leaving—include medical info and phone numbers for each member.
- Select a meetup spot if separated.
- Tell someone back home your route and expected return date—standard practice in American backpacking culture!
5. Maximizing Enjoyment and Building Group Memories
Group Bonding Ideas on the Trail
Spending several days together in the backcountry is a perfect chance to build stronger friendships and create unforgettable memories. Here are some simple yet effective ways to bond as a group:
| Activity | Description |
|---|---|
| Trail Games | Play classic games like “Would You Rather,” “20 Questions,” or nature scavenger hunts while hiking to keep spirits high and conversations flowing. |
| Shared Camp Tasks | Rotate cooking, setting up tents, or filtering water so everyone feels included and teamwork becomes second nature. |
| Group Challenges | Set fun goals such as finding the best lookout point or identifying local wildlife—friendly competition can boost morale. |
Storytelling Around the Campfire
The campfire is a time-honored place for connection after a long day on the trail. Take advantage of this cozy setting to share stories, laugh, and unwind. Here are a few ideas:
- Personal Adventures: Encourage everyone to share their favorite outdoor moments or funniest travel mishaps.
- Campsite Legends: Make up silly ghost stories or local legends to add a bit of adventure before bedtime (but keep it light if anyone gets spooked easily).
- Highlight Reel: Go around the circle and have each person share the best moment from that day’s hike.
Documenting the Journey Together
Cherishing your group trek goes beyond just memories—here’s how you can document your trip in ways that involve everyone:
- Shared Photo Album: Use a cloud service like Google Photos for everyone to upload pictures as you go. This makes sharing easy and lets everyone contribute their perspective.
- Trek Journal: Pass around a notebook each night for group members to write about the day’s highlights, funny quotes, or sketches.
- Video Clips: Film short video diaries at scenic spots, then edit them together for a fun recap after you return home.
Pacing and Abilities: Making Sure Everyone Enjoys the Adventure
The best group trips happen when everyone feels comfortable and included. Respect each other’s pace by planning regular breaks, encouraging open communication about energy levels, and making adjustments as needed. Consider using the “sweep” system—a rotating volunteer who hikes last—to ensure no one falls behind or feels rushed.
Quick Tips for Inclusivity on Group Treks
| Tip | Description |
|---|---|
| Pace Matching | Let slower hikers set the pace; remember, it’s about enjoying the journey together! |
| Caring Check-Ins | Regularly ask how everyone’s feeling—physically and emotionally—to address any issues early. |
| Diverse Activities | If some prefer relaxing at camp while others want to summit nearby peaks, split up temporarily so all preferences are honored. |