Recognizing Altitude Sickness Symptoms
When exploring remote hiking trails across the United States—whether in the Rockies, Sierra Nevada, or Appalachian highlands—its crucial to recognize the early and advanced signs of altitude sickness. The symptoms often start subtly, making early detection your best defense against serious complications. In the initial stages, hikers may experience headaches, dizziness, nausea, loss of appetite, fatigue, and difficulty sleeping. These early signs can be mistaken for regular tiredness from a challenging hike, so it’s important to stay vigilant and check in with yourself and your group frequently.
If altitude sickness progresses without intervention, advanced symptoms may include severe shortness of breath even while resting, confusion, persistent coughing (sometimes with pink or frothy sputum), chest tightness, and coordination problems such as stumbling or inability to walk in a straight line. These are red flags for life-threatening conditions like High Altitude Pulmonary Edema (HAPE) or High Altitude Cerebral Edema (HACE), both of which require immediate action. Timely recognition and response can make all the difference on remote American trails where help may be hours away. Understanding these signs equips you to keep yourself and your hiking partners safe during high-elevation adventures.
Immediate On-Trail Action Steps
Recognizing the signs of altitude sickness early is crucial for your safety, especially when you’re on a remote U.S. hiking trail with limited resources. If you or someone in your group begins to experience symptoms such as headache, dizziness, nausea, or shortness of breath, follow these step-by-step protocols immediately:
Step 1: Stop and Rest
At the very first sign of discomfort, halt all strenuous activity. Find a safe spot to sit down and allow your body to recover. Avoid pushing forward—continuing can make symptoms worse.
Step 2: Assess Symptoms
Monitor yourself and any affected companions. Use the table below for quick symptom evaluation:
| Symptom | Mild (AMS) | Severe (HACE/HAPE) |
|---|---|---|
| Headache | Yes | Severe/persistent |
| Nausea/Vomiting | Mild/upset stomach | Repeated vomiting |
| Dizziness | Lightheadedness | Loss of coordination/confusion |
| Breathing Difficulty | Slightly increased | Shortness of breath at rest/wheezing/coughing |
Step 3: Descend If Needed
If symptoms do not improve after resting for 30-60 minutes—or if they worsen—descent is your best immediate remedy. Even descending just 500–1,000 feet can significantly relieve symptoms. Prioritize safety over reaching your destination.
Step 4: Hydrate Properly
Dehydration can worsen altitude sickness. Sip water regularly but avoid drinking excessive amounts at once. If available, consider electrolyte tablets or sports drinks to replenish lost minerals.
Hydration Tips Table
| Situation | Recommended Action |
|---|---|
| Mild Symptoms/Resting | Sip small amounts every 10–15 minutes |
| Nausea Present | Suck on ice chips if possible; avoid gulping fluids |
| No Appetite/Weakness | Add electrolytes to water if available; try small snacks like crackers or nuts to stabilize blood sugar |
Step 5: Monitor Progress & Communicate
If you have a satellite messenger or cell signal, update someone on your condition and location. Keep monitoring for any escalation in symptoms, especially confusion or severe breathing difficulties—these require immediate evacuation assistance.
Your Safety Comes First!
The most important thing is listening to your body and not taking risks. Acting promptly when altitude sickness appears can prevent more serious health complications and ensure you get home safely from your adventure.
3. Using On-Hand First Aid and Emergency Gear
When altitude sickness strikes on remote U.S. hiking trails, quick and effective use of first aid and emergency gear can make a significant difference in outcomes. While waiting for help or deciding whether to descend, having the right supplies and knowing how to use them is crucial for both your safety and peace of mind.
Essential First Aid Kit Items for Altitude Sickness
Every backcountry hiker should carry a well-stocked first aid kit, tailored to the unique challenges of high-altitude environments. Key items include:
- Portable oxygen canisters: These lightweight devices provide supplemental oxygen and can be a literal lifesaver if someone’s symptoms become severe. Make sure you know how to operate them before your trip.
- Ibuprofen or acetaminophen: Over-the-counter pain relievers help manage headaches, which are common with altitude sickness. Always follow dosage instructions and consult your healthcare provider about any allergies or contraindications.
- Anti-nausea medication: Medications like meclizine (Dramamine) can help control nausea or vomiting.
- Electrolyte tablets or powders: Dehydration can worsen symptoms. Electrolyte supplements encourage fluid retention and balance in the body, especially when water sources are limited.
How to Use Your Gear Effectively
Administering Portable Oxygen
If you notice severe symptoms—such as shortness of breath at rest, confusion, or chest pain—help the affected person sit down and use the portable oxygen immediately. Keep the flow steady and monitor their response; even a few minutes of supplemental oxygen can provide relief until evacuation is possible.
Pain Relief and Hydration
For mild headaches or discomfort, give ibuprofen or acetaminophen with water. Encourage small sips rather than gulps to avoid upsetting the stomach further. If dehydration is suspected, dissolve electrolyte tablets in water according to package directions and offer this solution instead of plain water.
Treating Nausea
If nausea sets in, have anti-nausea medication available and follow package instructions carefully. Allow the individual to rest in a semi-upright position and keep them warm but not overheated.
Additional Tips for Women Hikers
If you’re hiking solo or with other women, consider packing extra feminine hygiene products (as dehydration and stress can affect menstrual cycles), as well as a discreet mirror for checking facial color—a bluish tint may signal low oxygen levels. Always store medications in waterproof containers, clearly labeled for easy access during emergencies.
Remember: Preparation is Empowerment
The best defense against altitude sickness is preparation—knowing what to bring, how to use it, and when to act decisively. A thoughtfully packed first aid kit tailored for high-altitude adventures helps ensure that even unexpected health issues don’t derail your journey through America’s stunning wilderness.
4. When and How to Call for Help
Recognizing when altitude sickness is becoming an emergency is critical, especially on remote U.S. hiking trails where immediate help may not be nearby. If symptoms like severe headache, confusion, shortness of breath at rest, inability to walk, or persistent vomiting appear—or if you’re simply not improving after resting and hydrating—it’s time to seek professional assistance. Here’s how to use the key U.S. emergency resources in these situations:
Understanding Your Emergency Options
| Resource | How to Use | Best For |
|---|---|---|
| 911 | Call directly from your cell phone if you have service. Clearly state your location (use GPS coordinates if possible), nature of the emergency, and number of people affected. | Life-threatening emergencies and rapid medical response needs |
| Local Search and Rescue (SAR) | If you know the local SAR number or have access via park rangers or trailheads, contact them directly. Provide detailed information about your condition and exact location. | Rescue operations in remote wilderness areas |
| Satellite Communication Devices (ex: Garmin inReach, SPOT) | Activate the SOS function for immediate connection to emergency response centers. Pre-program emergency contacts if possible and follow device prompts for sending location updates. | No cell service areas or when traditional calls aren’t possible |
Step-by-Step Directions for Getting Help
- If you or someone in your group shows signs of severe altitude sickness that are not improving, stop moving further and assess the situation calmly.
- If you have cell service, call 911 first—be prepared to share your exact location using coordinates from a GPS device or smartphone app.
- If no cell service is available, use your satellite communicator’s SOS feature immediately. These devices can transmit your GPS location even deep in backcountry areas.
- If you’re near a ranger station or staffed trailhead, make your way there only if it’s safe and reasonable to do so; they can coordinate with local SAR teams quickly.
Important Tips for Effective Emergency Calls
- Speak clearly and calmly; repeat key details as needed.
- If you’re traveling alone, consider sharing your itinerary ahead of time with friends or family who can alert authorities if you don’t check in as planned.
- Know that some remote U.S. trails may have limited response times; always carry extra supplies while waiting for help to arrive.
Your Safety Comes First
If there’s ever doubt about the severity of symptoms or ability to continue safely, err on the side of caution and activate emergency resources promptly. Taking swift action can make a life-saving difference when dealing with altitude sickness far from help.
5. Communicating Your Location and Status
When you’re hiking remote U.S. trails and altitude sickness becomes an emergency, being able to clearly communicate your exact location and physical status can save valuable time for responders. Here’s how to provide the right information so help reaches you quickly and efficiently.
Use Recognizable Landmarks
Start by identifying nearby U.S.-specific landmarks that are familiar to local rescuers. This could include prominent trailheads, distinctive rock formations, mile markers, or even well-known campsites. For example, say “We are a half mile north of Devil’s Postpile Trailhead” instead of vague descriptions like “near some trees.”
Leverage Digital Navigation Tools
Your smartphone can be a lifesaver if you have signal. Use GPS apps such as AllTrails, Gaia GPS, or Google Maps to pinpoint your coordinates. When calling 911 or messaging rescue services, read out or text your exact latitude and longitude (e.g., “I am at 37.7429°N, 119.5731°W”). If you use a satellite communicator like Garmin inReach or SPOT, activate the SOS function and let it transmit your real-time location to emergency responders.
Pro Tip:
If youre using a navigation app, take a screenshot of your map location and send it if possible when texting emergency contacts or responders.
Describe Your Condition Clearly
Be specific about symptoms: mention severe headache, nausea, confusion, or loss of consciousness. Rate their severity on a scale of 1–10 if you can. Also share any actions you’ve already taken (such as moving to lower altitude or administering oxygen) and whether anyone in your group is unable to walk.
Stay Calm and Organized
Keep messages brief but detailed. Speak slowly and repeat critical information. If calling 911, follow their instructions carefully—dispatchers may ask you to stay on the line for updates or help triangulate your position.
Remember:
In remote areas with poor cell service, try texting 911—a growing number of U.S. counties support this feature. Satellite messengers are highly recommended for off-grid adventures.
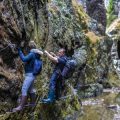
6. Supporting Fellow Hikers
Altitude sickness can strike unexpectedly, and on remote U.S. hiking trails, group support is essential for everyone’s safety and well-being. Whether you’re in the Rockies or the Sierra Nevada, understanding how to assist fellow hikers experiencing symptoms is a crucial part of emergency preparedness. Here’s practical guidance to help you care for your group and respond effectively.
Prioritize Group Safety First
If someone in your party shows signs of altitude sickness—such as headache, nausea, dizziness, or confusion—stop and assess the situation together. Always place group safety above personal goals; never push on if a member is struggling. Find a safe spot off the trail to regroup, check symptoms, and make decisions as a team.
Establish Clear Leader Roles
Before setting out, designate a leader or rotate this responsibility so someone is always in charge during emergencies. The leader should stay calm, communicate clearly, and coordinate responses such as monitoring symptoms, calling for help if needed, and keeping the group together. Encourage open communication so that everyone feels comfortable reporting symptoms early.
Distribute Tasks Effectively
Assign specific roles to each group member based on their skills and comfort level. For example: one person can monitor the sick hiker, another can manage navigation or search for phone signal to contact emergency services, while others gather supplies like water or extra clothing. Spreading out responsibilities prevents overwhelm and ensures critical needs are met quickly.
Practice Supportive Group Dynamics
Stay positive and encouraging—altitude sickness can be scary and isolating. Offer reassurance, share snacks or water, and use humor appropriately to keep spirits up. Avoid blaming anyone for slowing down; remember that altitude affects everyone differently and mutual support is key to finishing safely.
Review Emergency Plans Together
Make sure everyone knows the group’s emergency protocols before hitting the trail: where to find first aid kits, how to use GPS or satellite messengers, and what steps to take if evacuation becomes necessary. Practice these plans during breaks so they become second nature in an actual emergency.
By fostering teamwork and clear communication, your group will be better prepared to handle altitude sickness together—helping everyone enjoy America’s beautiful trails safely.
7. Prevention and Preparation Tips
Before you set foot on a high-altitude trail in the U.S., a little extra planning can go a long way toward keeping you safe and healthy. Here are practical steps to help you acclimate and reduce your risk of altitude sickness on remote hikes:
Acclimatization Is Key
If possible, arrive at your destination a day or two early to give your body time to adjust to higher elevations. Start with lower-elevation trails before attempting more challenging hikes. Gradually increasing your altitude exposure is one of the best ways to allow your body to adapt and minimize symptoms.
Get Trail-Ready With Fitness
A solid fitness base will help your body cope better with the physical demands of hiking at altitude. Focus on building cardiovascular endurance, leg strength, and balance before your trip. Remember, even experienced hikers can be affected by altitude—so listen to your body, no matter your experience level.
Hydrate, Hydrate, Hydrate
Staying hydrated is crucial at high elevations, where dry air and increased respiration can lead to dehydration quickly. Carry enough water for your hike—and more than you think youll need. Make it a habit to sip water regularly instead of waiting until youre thirsty. Avoid excessive caffeine and alcohol, as these can increase dehydration risk.
Plan Ahead for Safety
Research your trail thoroughly: check recent trail reports, elevation profiles, weather forecasts, and park guidelines. Share your itinerary with someone you trust and know where emergency services are located along your route. Pack essentials like a map, compass or GPS, snacks high in carbohydrates, extra layers, sunscreen, and a basic first-aid kit that includes medication for altitude sickness if recommended by your doctor.
Proactive Steps for Women Hikers
If you’re hiking solo or with other women, prioritize group communication and look out for each other’s well-being. Don’t hesitate to turn back if you or anyone in your group starts feeling unwell—your safety always comes first.
Your Adventure Starts With Smart Choices
With thoughtful preparation—acclimatizing properly, maintaining good fitness levels, staying hydrated, and planning ahead—you’ll boost your confidence and minimize risks on any U.S. altitude hike. The mountains are calling; make sure you’re ready for them so you can savor every moment of your adventure safely!