1. Why Dehydrate Your Own Backpacking Meals?
If you’ve ever spent time on the trail in the U.S., you know how important it is to have meals that are lightweight, easy to prepare, and satisfying. That’s why more and more American backpackers are choosing to dehydrate their own food at home before hitting the backcountry. Let’s break down exactly why this DIY approach is so popular—and why you might want to try it yourself.
Save Money Compared to Store-Bought Meals
Pre-packaged dehydrated meals from outdoor brands can be pricey—often $8 to $15 per serving! By dehydrating your own food, you can create multiple meals for a fraction of the cost, using ingredients you already have or can buy in bulk.
| Option | Average Cost Per Meal |
|---|---|
| Store-Bought Backpacking Meal | $8–$15 |
| Homemade Dehydrated Meal | $2–$5 |
Total Control Over Nutrition and Ingredients
When you make your own meals, you decide exactly what goes in. Want high-protein, gluten-free, vegan, or low-sodium options? No problem! You can adjust recipes to match your dietary needs or preferences—something mass-produced options just can’t offer.
Customize for Taste and Comfort
Ever get tired of the same old flavors in packaged backpacking food? With DIY dehydrating, you’re in charge. Bring your favorite home-cooked recipes on trail or experiment with new flavors. Plus, you can use real ingredients for a fresher taste and avoid additives or preservatives common in commercial products.
Why It’s So Popular with American Backpackers
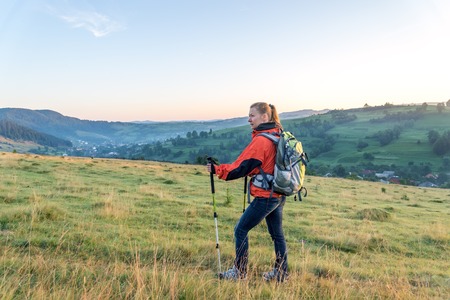
For many hikers in the U.S., dehydrating meals has become almost a rite of passage. It’s a way to prep for adventures while saving money, eating healthier, and enjoying food that feels like home—even miles from civilization. Whether you’re section hiking the Appalachian Trail or camping out in Yosemite, homemade dehydrated meals let you eat well without the extra weight or cost.
2. Essential Gear and Ingredients
Must-Have Equipment for Dehydrating Meals
If you want to start making your own dehydrated backpacking meals, having the right equipment is key. Here’s a quick overview of the gear that’ll make the process smoother and more effective:
| Equipment | Description & Tips |
|---|---|
| Food Dehydrator | The workhorse of your setup. Look for models with adjustable temperature settings and stackable trays. Popular brands in the U.S. include Nesco and Excalibur. |
| Vacuum Sealer | Helps keep your meals fresh for longer by removing air from storage bags. FoodSaver is a common choice found at big retailers like Walmart or Target. |
| Parchment Paper or Silicone Mats | Prevents food from sticking to dehydrator trays, especially for sauces and fruit leathers. |
| Sharp Knife & Cutting Board | Makes prepping ingredients faster and safer. |
| Mixing Bowls & Measuring Cups | Useful for portioning and mixing meal components before dehydrating. |
| Mason Jars or Resealable Bags | For storing dehydrated ingredients or finished meals; Mason jars are great if you’re prepping ahead at home. |
Choosing the Right Ingredients in the U.S.
Selecting high-quality, easy-to-dry foods makes all the difference for tasty, lightweight backpacking meals. Here’s how to pick ingredients at American grocery stores and farmers’ markets:
Best Ingredients for Dehydrating
| Category | Recommended Foods | Shopping Tips (U.S.-Specific) |
|---|---|---|
| Vegetables | Corn, carrots, bell peppers, peas, broccoli, spinach, sweet potatoes, zucchini | Fresh produce sections or local farmers’ markets offer seasonal veggies—look for “ugly” produce deals to save money! |
| Fruits | Apples, bananas, strawberries, blueberries, peaches, mangoes | Berries from local farms are ideal in summer; store brands like Driscoll’s are available year-round in most supermarkets. |
| Proteins* | Cooked chicken breast, lean ground beef (pre-cooked), beans (canned or cooked from dry), tofu (pressed) | Canned beans save time; look for pre-cooked rotisserie chicken for easy meal prep. Always cook meat thoroughly before dehydrating. |
| Grains & Starches | Rice (white or brown), quinoa, pasta (small shapes), instant mashed potatoes, couscous | Bulk bins at stores like Whole Foods are budget-friendly. Choose smaller pasta shapes for faster rehydration on trail. |
| Sauces & Extras* | Pasta sauce (homemade or store-bought), salsa, hummus, peanut butter powder, shredded cheese (low-fat) | Avoid high-fat items—they don’t dehydrate well. Use parchment paper for drying saucy foods. |
*Pro Tip: When dehydrating proteins and sauces, stick with low-fat versions since fats can spoil quickly during storage.
Where to Shop in the U.S.
- Big-Box Grocery Stores: Safeway, Kroger, Walmart — Good for staple ingredients and affordable bulk buys.
- Farmers’ Markets: Great source for ultra-fresh local produce; many towns have weekly markets spring through fall.
- Health Food Stores: Trader Joe’s, Whole Foods — Perfect for specialty grains and organic options.
- Cultural Markets: Asian or Latin grocery stores often carry unique veggies and spices that add variety to your meals.
This essential gear and ingredient guide will set you up for success as you dive into making your own delicious backpacking meals!

3. Step-by-Step Dehydration Process
Meal Planning the American Way
Before firing up your dehydrator, start with a meal plan that matches your backpacking style. Think about calorie needs, pack weight, and the types of food you love after a long day on the trail. Typical American backpackers often go for hearty meals like chili, pasta, rice dishes, or burrito bowls. Here’s a quick look at how to choose meals:
| Meal Type | Backpacker Favorites | Why Its Great |
|---|---|---|
| Breakfast | Oatmeal, granola, scrambled eggs | Quick energy, easy to rehydrate |
| Lunch | Couscous salad, instant soup, wraps | No-cook or just add hot water |
| Dinner | Pasta primavera, chili, curry rice | Hearty and satisfying after hiking |
| Snacks | Jerky, trail mix, dried fruit | Ready-to-eat and calorie dense |
Prepping Your Ingredients
Chop all ingredients into small, uniform pieces—think bite-sized or smaller. This helps them dry evenly and rehydrate quickly in camp. If you’re using canned beans or pre-cooked pasta, rinse them first to remove excess salt and starch.
Tips for Prepping:
- Avoid high-fat foods: They don’t dehydrate well and can spoil faster.
- Cook before drying: Foods like rice, pasta, and meats need to be fully cooked before dehydration.
- Season lightly: Flavors concentrate as water is removed.
The Dehydrating Process Step-by-Step
- Arrange Food: Spread prepared food in a single layer on dehydrator trays. Avoid piling up ingredients—it slows down drying.
- Set Temperature: Most vegetables and fruits do best at 135°F (57°C). Meats should be dried at 160°F (71°C) for safety.
- Dry Time: Check every few hours. Fruits take 6–12 hours; veggies 6–10 hours; cooked meals may need 8–12 hours depending on moisture content.
- Test for Doneness: Food should be brittle or leathery with no wet spots.
- Cool Before Storing: Let everything cool completely before packaging to avoid condensation inside your bags.
Packing & Labeling Like a Pro Backpacker
Tightly pack dehydrated meals in zip-top freezer bags or vacuum-seal bags for extra protection against moisture. Use a Sharpie to label each bag with the meal name, date, and how much water to add when rehydrating on the trail—trust us, your future self will thank you!
| Packing Method | Best For | Packing Tip |
|---|---|---|
| Zip-top Freezer Bags | Short trips (up to a week) | Squeeze out as much air as possible before sealing. |
| Vacuum Sealing Bags | Longer expeditions or humid climates | Add an oxygen absorber if storing longer than a month. |
| Mason Jars (for storage at home) | Bigger batches/meal prepping ahead of time | Toss in a silica gel pack to keep things extra dry. |
Packing Checklist:
- Date & name each meal clearly on the bag.
- Add simple cooking instructions (e.g., “Add 1 cup boiling water”).
- If including seasonings separately, label those too!
This step-by-step approach makes it easy to create delicious, lightweight meals tailored to your tastes—American-style—and ready for any adventure from the Appalachian Trail to Yosemite.
4. Safe Storage and Shelf Life
Keeping Your Dehydrated Meals Fresh on the Trail
After you’ve put in the work to dehydrate your own backpacking meals, it’s important to store them properly so they stay tasty and safe to eat when adventure calls. Here’s how you can make sure your food stays fresh, with tips that fit U.S. climates and food safety standards.
Best Storage Techniques for Dehydrated Meals
- Airtight Containers: Store your dehydrated meals in airtight containers or heavy-duty freezer bags. Squeeze out as much air as possible before sealing to keep out moisture and oxygen.
- Cool, Dark, Dry Places: Keep your meals away from heat and sunlight. A pantry, basement, or closet works well—especially if you live somewhere hot or humid.
- Vacuum Sealing: For longer shelf life and extra freshness, vacuum seal your portions. This is especially helpful if you’re prepping for a long trip or want to store meals for several months.
- Portion Control: Divide meals into single servings before storing. This keeps things organized and prevents repeated exposure to air when you open a bag.
Shelf Life Expectations
| Storage Method | Shelf Life (Approx.) | Notes |
|---|---|---|
| Zip-top Freezer Bag | Up to 6 months | Keep in cool, dark place; check for moisture regularly |
| Vacuum-Sealed Bag | 6-12 months | Ideal for longer storage; best used within one year |
| Airtight Jar (Glass/Plastic) | 4-8 months | Good for home storage; not always trail-friendly due to weight |
Food Safety Tips for U.S. Climates
- Avoid Moisture: Humidity is a big enemy—especially in southern and coastal states. Use silica gel packets (food-safe) or oxygen absorbers for extra protection against moisture.
- Date Your Bags: Always write the date of dehydration on each package so you know how old it is at a glance.
- Mold & Spoilage: Before hitting the trail, check each meal for any signs of mold, off smells, or color changes. When in doubt, throw it out!
- No Preservatives Needed: If dried thoroughly and stored right, your meals don’t need extra preservatives—just good technique.
- Temperature Extremes: If you’re backpacking in hot areas (like the Southwest), keep dehydrated food in a shaded part of your pack to avoid spoilage.
- Packing Out Trash: U.S. National Parks require all waste be packed out—including food wrappers. Bring an extra zip bag for empties!
Your Checklist Before You Go
- Check packaging for leaks or damage
- Squeeze test: bags should feel dry inside—no clumping!
- Packing order: put heavier items at the bottom of your food bag or bear canister
- If possible, do a “sniff test” before cooking on the trail—if it smells off, skip it
This way, you’ll have lightweight, safe-to-eat meals ready to fuel every mile of your backpacking journey!
5. Trail Cooking and Meal Ideas
Rehydrating Your Dehydrated Meals on the Trail
When youre on the trail, rehydrating your homemade backpacking meals is easier than you might think. All you really need is hot water, your dehydrated meal, and a little patience. Here’s a simple method:
- Boil enough water to fully cover your dried meal (usually about 1 to 2 cups per serving).
- Add the boiling water directly into the bag or container with your dehydrated food.
- Stir well, seal the bag or cover the container, and let it sit for 10–20 minutes.
- Check for texture; if it’s still dry, add a bit more hot water and wait a few more minutes.
If you’re using a cozy (an insulated pouch), it helps keep the heat in and speeds up the process. Pro tip: test your recipes at home first to dial in your ideal water-to-food ratio!
Tried-and-True Backpacker Recipes
Backpackers across the U.S. swear by certain meal combos that are both delicious and easy to make from dehydrated ingredients. Here are some favorites:
| Recipe Name | Main Ingredients | Rehydration Tips |
|---|---|---|
| Classic Chili Mac | Pasta, ground beef (or TVP), beans, tomato sauce, spices | Add extra water for pasta; let sit longer for full flavor melding |
| Curry Rice Bowl | Rice, mixed veggies, chicken, coconut milk powder, curry spices | Add coconut milk powder after initial soak for best texture |
| Hearty Breakfast Scramble | Egg powder, hash browns, bell peppers, onions, cheese powder | Use less water at first; add more if needed for fluffy eggs |
| Lentil Stew | Lentils, carrots, potatoes, celery, broth powder, herbs | Pre-soak lentils overnight if possible for quicker cook time |
| Pasta Primavera | Pasta, zucchini, tomatoes, mushrooms, garlic powder, olive oil packet | Add olive oil after rehydration for rich flavor and calories |
| Savory Oatmeal Bowl | Oats, bacon bits (or soy crumbles), cheddar cheese powder, green onions | Use boiling water and stir well for creamy consistency |
Extra Tips for Peak Performance & Enjoyment
- Flavor Boosts: Pack small packets of hot sauce, soy sauce, or spice mixes to jazz up any meal.
- Add Freshness: If weight allows, bring some fresh herbs like parsley or chives to toss in before eating.
- Energy Dense Additions: Drizzle olive oil or sprinkle in nuts/seeds right before eating to up your calorie count without much bulk.
- Keep It Simple: The fewer pots and utensils you use on the trail, the easier cleanup will be—just pour hot water straight into your meal pouch whenever possible.
- Taste Test: Always try out new recipes at home before hitting the trail to make sure you love them!
This way you’ll stay fueled and happy mile after mile with homemade meals that taste great and keep you going strong on every adventure.