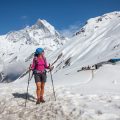
1. Understanding Common Causes of Trail Slips, Trips, and Falls
Hiking is a great way to explore America’s beautiful outdoors, but even the most experienced hikers can lose their footing from time to time. On popular U.S. trails, there are a handful of common hazards that often lead to slips, trips, or falls. Knowing what to look out for can help you stay safe and enjoy your adventure.
Overview of Typical Trail Hazards
American trails vary widely in terrain and difficulty, but several obstacles show up time and again. Here’s a look at what you might encounter:
| Hazard | Description | Where It’s Commonly Found |
|---|---|---|
| Loose Gravel | Small rocks that shift underfoot, causing loss of balance. | Desert trails, mountain paths, fire roads |
| Exposed Roots | Tree roots sticking out of the ground that can catch your toe. | Wooded trails, forest parks, riverbanks |
| Wet Rocks | Slippery surfaces made slick by rain or stream crossings. | Waterfall hikes, creek crossings, shaded canyons |
| Muddy Sections | Slick mud patches that make footing unstable. | After rainstorms, low-lying areas, springtime trails |
| Uneven Steps or Ledges | Naturally uneven terrain or manmade steps that aren’t uniform in height. | Canyons, rocky climbs, historic sites with old stonework |
| Unexpected Obstacles | Fallen branches, animal burrows, and debris on the trail. | Heavily wooded areas, less-maintained trails |
Why Do These Hazards Cause Accidents?
The main reason these trail features cause trouble is because they’re easy to overlook—especially if you’re enjoying the scenery or chatting with friends. Wet rocks and mud reduce traction under your boots. Loose gravel shifts suddenly. Exposed roots or uneven ledges trip up your stride when you least expect it.
Quick Tips for Spotting Trouble Early:
- Scan the trail ahead: Look a few steps in front of you rather than directly down at your feet.
- Pace yourself: Slow down in tricky sections like creek crossings or rocky slopes.
- Watch after rain: Trails can change quickly with weather—what was stable yesterday could be slick today.
- Tread carefully on unfamiliar ground: If you’re new to a trail or region, take extra care until you know what to expect.
Understanding these hazards is the first step toward staying upright and making the most out of every hike on America’s vast network of trails.
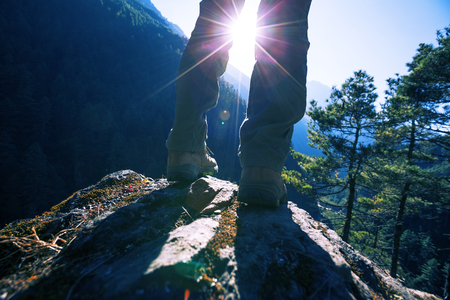
2. Preventative Measures: Staying Upright on the Trail
Choose the Right Footwear
Wearing proper shoes is your first line of defense against slips, trips, and falls. Look for hiking boots or trail shoes with good traction, ankle support, and a comfortable fit. Avoid old sneakers or sandals—these can make you more likely to lose your footing.
| Shoe Feature | Why It Matters |
|---|---|
| Good Traction Soles | Reduces slipping on wet or loose surfaces |
| Ankle Support | Helps prevent twists and sprains on uneven ground |
| Proper Fit | Avoids blisters and keeps you steady as you walk |
Make Use of Trekking Poles
Trekking poles aren’t just for hardcore hikers—they give everyone extra stability, especially on steep or rocky trails. They help you balance, take pressure off your knees, and test out tricky spots before you step.
Tips for Using Trekking Poles:
- Adjust the length so your arms are at a 90-degree angle when holding the grips
- Plant both poles securely before stepping through mud, streams, or snow patches
- If going downhill, keep poles slightly in front for better balance
Pace Yourself and Take Breaks
Rushing increases your chances of tripping or losing your balance. Set a pace that lets you watch where you’re going and gives you time to react to obstacles. Remember, it’s not a race—take regular breaks to catch your breath and scan the trail ahead.
Stay Alert to Changing Terrain
The trail can change quickly—from dry dirt to slick rocks or roots. Stay focused and scan several feet ahead so you’re ready for whatever comes next. If it’s raining, be extra cautious: wet leaves and rocks are especially slippery.
| Terrain Type | Potential Hazards | How to Stay Safe |
|---|---|---|
| Muddy Trails | Slippery footing, hidden holes | Slow down, use trekking poles, step around deep mud if possible |
| Rocky Areas | Lose rocks, uneven surfaces | Test rocks before stepping, use both hands if needed for balance |
| Forest Floor with Roots | Easily trip over exposed roots | Keep eyes down, lift feet higher than usual when walking here |
| Slick Leaves or Mossy Surfaces | Very slippery even when dry | Tread lightly, consider alternate paths if it looks too risky |
3. What to Do When You Take a Spill
Step-by-Step Guidance After a Fall on the Trail
Falls happen, even to seasoned hikers. Knowing what to do right after can help prevent further injury and get you safely back on your feet. Here’s a straightforward guide to follow if you take a spill while hiking:
Step 1: Pause and Breathe
Don’t rush to get up immediately. Take a few deep breaths to calm yourself and check in with your body. Sometimes adrenaline can mask pain or injury.
Step 2: Self-Assessment
| Check | What to Look For |
|---|---|
| Head | Dizziness, confusion, vision changes |
| Neck/Back | Pain, tingling, inability to move comfortably |
| Arms/Legs | Pain, swelling, numbness, visible injuries |
| Bleeding | Cuts, scrapes, or wounds needing attention |
| Gear Check | Broken trekking poles, torn clothing, lost items |
Step 3: Getting Up Safely
- If possible, roll onto your side before trying to sit up. This helps avoid sudden dizziness.
- Use your arms and legs to push yourself up slowly. If you feel sharp pain or instability, stop and reassess.
- If you’re carrying a backpack, consider taking it off first to make standing easier.
- If the ground is slippery or uneven, look for sturdy rocks or trees for support as you rise.
Step 4: Assess Your Injuries Again
- If you notice any severe pain, inability to bear weight, or signs of concussion (like confusion or nausea), it’s best not to continue hiking alone. Consider calling for help if cell service is available.
- If injuries are minor (scrapes or bruises), clean and cover wounds with your first aid kit before continuing.
- Take a few moments to rehydrate and eat a snack if you feel shaken up.
Quick Tips for Trail Falls:
- Always hike with a buddy when possible—having someone there makes post-fall recovery much safer.
- Carry basic first aid supplies for handling cuts and scrapes.
- Know the nearest trail exit in case you need to leave quickly.
4. Trail First Aid for Slips and Falls
Essential First Aid Tips for Common Injuries
When hiking in the U.S., slips, trips, and falls are bound to happen—even to experienced hikers. Knowing basic first aid can make a big difference. Here’s how to handle the most common injuries you might encounter on the trail:
First Aid for Scrapes and Cuts
| Injury | What To Do |
|---|---|
| Minor Scrapes & Cuts | Rinse with clean water (bottled or filtered if possible). Gently remove any dirt or debris. Apply an antibiotic ointment if you have it, then cover with a sterile bandage. |
| Deeper Cuts | Apply firm pressure with a clean cloth or gauze to stop bleeding. Once bleeding stops, clean the area if possible and bandage it securely. If bleeding won’t stop after 10-15 minutes, seek help right away. |
Sprains and Strains: What to Do
- Rest: Stop using the injured limb as much as possible.
- Ice: If you have an ice pack or even cold water bottles, apply them to reduce swelling.
- Compression: Wrap the injured area with an elastic bandage—snug but not too tight.
- Elevation: Keep the injured part raised above heart level if you can.
When Things Get Serious: Handling Emergencies Until Help Arrives
- Bones sticking out: Don’t try to push the bone back in. Cover with a clean cloth and keep the person still. Call for help or use your emergency beacon/phone if available.
- Heavy Bleeding: Apply steady pressure with a cloth or bandage, and keep applying more layers if blood soaks through—don’t remove old ones.
- Painful head or neck injuries: Keep the person still and avoid moving them unless absolutely necessary for safety reasons.
- If someone loses consciousness: Check their breathing and pulse. If trained, perform CPR if needed and call 911 (or use a satellite device).
Packing Your Trail First Aid Kit: Quick Checklist
| Item | Why You Need It |
|---|---|
| Bandaids & Gauze Pads | Treat cuts, scrapes, and blisters fast. |
| Elastic Bandage (ACE wrap) | Support sprains or strains; can also be used for compression. |
| Antibiotic Ointment Packets | Prevent infection in minor wounds. |
| Tweezers & Small Scissors | Remove splinters, cut tape/bandages. |
| Cleansing Wipes or Alcohol Pads | Sterilize wounds before bandaging. |
| Moleskin/Blister Pads | Avoid painful blisters from long hikes. |
| Pain Relievers (like ibuprofen) | Eases aches from falls or bumps. |
Having some basic first aid know-how helps keep everyone safer on the trail. These steps will help you deal with most slips, trips, and falls until you can get professional help if you need it.
5. When to Call for Help and How to Stay Safe Until Rescue
Recognizing When to Seek Assistance
If you or someone in your group experiences a slip, trip, or fall on the trail, its important to quickly assess the situation. Not every stumble requires outside help, but certain situations do. Here are some signs that you should call for help:
| Situation | What To Do |
|---|---|
| Severe bleeding that wont stop | Apply pressure and call for emergency assistance immediately |
| Broken bones or inability to move a limb | Immobilize the area and seek professional help |
| Head, neck, or back injury suspected | Keep the person still and call for rescue services right away |
| Loss of consciousness, even briefly | Call 911 or park rangers as soon as possible |
| Unable to walk out on your own due to pain or injury | Stay put and request assistance |
Making an Emergency Call: 911 vs Park Rangers
If you determine that help is needed, know who to contact. In the U.S., 911 is the universal emergency number. However, in national parks or wilderness areas, contacting park rangers may get you specialized assistance faster.
How To Make An Emergency Call in the Backcountry:
- If you have cell service, dial 911 first. Clearly state your location and nature of the injury.
- If youre in a national park or protected area, use any available emergency phones or radio systems to reach park rangers.
- If you dont have cell service, send two responsible group members (never just one) to the nearest area with reception or ranger station.
- Carry a whistle, signal mirror, or personal locator beacon (PLB) for remote areas where phones may not work.
Staying Safe While Waiting for Help
Your safety is top priority while waiting for rescue. Here are some tips to stay safe until help arrives:
- Stay Calm: Panic can make injuries worse. Take deep breaths and reassure others.
- Shelter in Place: If possible, move to a safe area away from hazards like falling rocks or unstable ground.
- Keep Warm: Use extra clothing, space blankets, or rain gear to prevent hypothermia if its cold or wet.
- Make Yourself Visible: Lay out brightly colored clothing or gear where rescuers can see it from a distance.
- Avoid Moving Seriously Injured People: Unless there’s immediate danger (like fire), keep injured persons still and comfortable until help arrives.
- Monitor Symptoms: Watch for changes in consciousness, breathing difficulties, or increased pain. Be ready to provide this info to rescuers.
- Conserve Resources: Ration water and snacks if help may take several hours.
Packing Essentials for Emergencies (Quick Reference)
| Item | Why Its Important |
|---|---|
| First Aid Kit | Treat wounds and injuries while waiting for help |
| Whistle/Signal Mirror | Attract attention if you’re off-trail or hard to spot |
| Space Blanket/Rain Poncho | Stay dry and warm in poor weather conditions |
| Cell Phone/PLB | Contact emergency services or send GPS location |
If youre ever unsure whether your situation is serious enough to warrant calling for help, its better to be safe than sorry—reach out to professionals who can assist you. Your safety comes first on every hike!