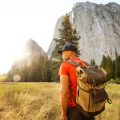
1. Planning Your Rim-to-Rim Adventure
Backpacking the Grand Canyon from rim to rim is one of the most iconic hikes in America. Before you lace up your boots and hit the trail, its crucial to plan ahead for a safe and unforgettable experience. This section covers all the essential steps you need to take before your adventure begins.
Choosing the Best Season
The Grand Canyon’s weather can be extreme, so timing is everything. Most backpackers aim for late spring (May–early June) or early fall (mid-September–October) when temperatures are milder and water sources are reliable. Summer brings dangerous heat, especially in the inner canyon, while winter can mean snow and ice at higher elevations.
| Season | Pros | Cons |
|---|---|---|
| Spring (May–early June) | Mild temps, reliable water, wildflowers | Popular, permits go fast |
| Summer (June–August) | Longest daylight hours | Extreme heat, risk of dehydration |
| Fall (mid-Sept–Oct) | Cooler temps, fewer crowds | Shorter days, unpredictable weather |
| Winter (Nov–Mar) | Solitude on the trail | Snow/ice at rims, some facilities closed |
Obtaining Permits
A backcountry permit is required for any overnight trip below the rim. The Grand Canyon National Park’s Backcountry Information Center handles these permits. Applications open four months in advance and fill up quickly, especially for popular dates and routes. Be ready to submit multiple itinerary options to increase your chances of securing a permit.
Permit Tips:
- Apply as early as possible (four months ahead)
- Have alternative dates and routes ready
- If you don’t get a permit in advance, try for a walk-in spot at the Backcountry Office—these are limited and not guaranteed
Selecting Your Trail Route
The classic rim-to-rim trek typically goes from the North Rim to the South Rim or vice versa. The most common route uses the North Kaibab Trail down to the Colorado River and then up via either the Bright Angel Trail or South Kaibab Trail. Each trail has its own character and challenges:
| Trail Segment | Miles | Main Features |
|---|---|---|
| North Kaibab Trail (North Rim to Phantom Ranch) | 14 miles | Lush canyon walls, Ribbon Falls, Cottonwood Campground |
| Bright Angel Trail (Phantom Ranch to South Rim) | 9.5 miles | Water sources en route, shade shelters, Indian Garden Campground |
| South Kaibab Trail (Phantom Ranch to South Rim) | 7 miles | Spectacular views, no water on trail, steep climb out |
Things to Consider:
- The North Rim opens mid-May through mid-October only—plan accordingly!
- The South Kaibab Trail is more exposed with no potable water; Bright Angel offers more shade and water refills.
- You can hike north-to-south or south-to-north; logistics for transportation may differ.
The Importance of Advance Preparation
This isn’t just any hike—it’s a physically demanding journey with big elevation changes and exposure to sun and heat. Training hikes with similar elevation gain/loss are highly recommended. Make sure you have appropriate gear for both hot days and chilly nights. Research shuttle services or arrange car swaps if you’re not hiking out-and-back. Remember: good planning means a safer, more enjoyable trip!
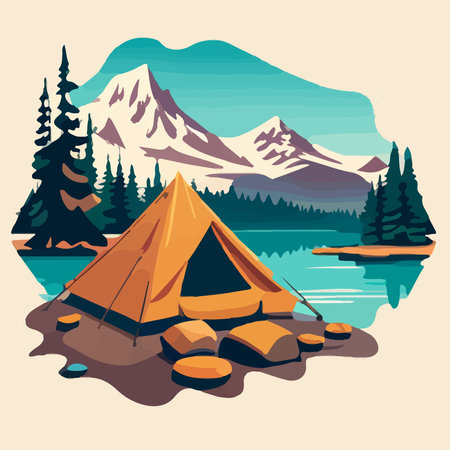
2. Gear and Packing Tips for the Canyon
Must-Have Backpacking Gear for Grand Canyon Conditions
The Grand Canyon’s unique environment—extreme temperature swings, rocky terrain, and limited water sources—means your backpacking gear needs to be carefully selected. Here’s a breakdown of essential items you should pack:
| Gear Category | Recommended Items | Why You Need It |
|---|---|---|
| Backpack | Internal frame, 50-65L capacity | Comfortable support and enough space without overpacking |
| Tent/Shelter | Lightweight tent or bivy sack | Shelter from wind, rain, and insects; keep it light! |
| Sleeping System | 30°F sleeping bag, lightweight pad | Nights can get chilly even in summer; insulation is key |
| Clothing Layers | Synthetic/wool base layers, sun shirt, fleece jacket, rain shell, wide-brim hat | Layering helps regulate body temperature as weather changes quickly |
| Footwear | Broken-in hiking boots or trail runners, moisture-wicking socks, camp shoes (optional) | Sturdy footwear prevents blisters and provides support on rocky trails |
| Water Filtration & Storage | Filter or purifier, 4-6L carrying capacity (bottles/bladders) | Canyon water sources are limited; always treat water before drinking |
| Navigation Tools | Map, compass, GPS (optional), route printouts/permit copies | No cell service in many areas—rely on physical navigation tools! |
| Emergency & First Aid Kit | Small kit with bandages, blister care, electrolytes, whistle, headlamp with extra batteries | The canyon is remote; be ready to handle minor injuries or issues yourself |
| Trekking Poles (optional) | Adjustable trekking poles | Eases knee strain during steep descents and ascents |
Packing Weight Recommendations for Comfort & Safety
Keeping your pack weight manageable is critical for a successful rim-to-rim trek. Aim for a total pack weight (including food and water) between 25-35 lbs (11-16 kg). Here are some tips:
- Go ultralight where possible: Prioritize lightweight gear and avoid unnecessary extras.
- Ditch bulky packaging: Repackage food into zip-top bags to save space.
- Cull non-essentials: Only bring what you’ll actually use—leave “just in case” items behind unless they’re related to safety.
Packing Hacks for Rim-to-Rim Comfort & Safety
- Lining your pack: Use a trash compactor bag as a liner inside your backpack to keep gear dry from sudden storms or water spills.
- Pace your snacks: Store trail snacks in side pockets or hip belt pouches so you can eat while hiking without unpacking.
- Sunscreen & lip balm: Place these in easy-to-reach pockets—you’ll need frequent application under the desert sun.
- Shoes at night: Put shoes inside your tent vestibule or in a stuff sack to keep scorpions out while you sleep.
Canyon-Specific Advice: Water Is Everything!
The number one rule: always know where your next water source is. The National Park Service posts seasonal updates about which water stations are operational along the corridor trails (Bright Angel and North/South Kaibab). Carry more than you think you need—the heat can catch up with you fast. Hydrate often and add electrolytes if temperatures soar.
Packing smart makes all the difference when backpacking rim-to-rim. With the right gear and strategies, you’ll enjoy one of America’s greatest adventures safely and comfortably!
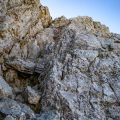
3. Navigating the Trails: Route Breakdown
Overview of Popular Rim-to-Rim Routes
Backpacking the Grand Canyon Rim-to-Rim is a bucket-list adventure for many hikers in the U.S. There are two main ways to cross the canyon: going from North Rim to South Rim or vice versa. Both directions offer incredible scenery, challenging terrain, and unforgettable memories. Most backpackers follow these classic routes:
| Route | Starting Trailhead | Ending Trailhead | Total Distance (miles) | Total Elevation Gain/Loss (ft) |
|---|---|---|---|---|
| North-to-South | North Kaibab Trail | Bright Angel Trail or South Kaibab Trail | 21-24 | ~6,000 descent, ~4,500 ascent |
| South-to-North | Bright Angel Trail or South Kaibab Trail | North Kaibab Trailhead | 21-24 | ~4,500 descent, ~6,000 ascent |
Main Trails and Descriptions
North Kaibab Trail (North Rim)
- Distance: 14 miles from North Rim to Phantom Ranch/Bright Angel Campground
- Description: Starts at 8,241 feet and drops through pine forests, Redwall limestone, and slot canyons. You’ll pass Cottonwood Campground and Ribbon Falls on your way down.
- Water Sources: Seasonal water at Supai Tunnel, Roaring Springs, and Cottonwood Campground (check ahead for availability)
- Highlights: Cooler temps at higher elevations, wildflowers in spring/early summer, dramatic cliffs.
Bight Angel Trail (South Rim)
- Distance: 9.5 miles from Phantom Ranch to South Rim Village
- Description: The most popular exit/entry trail. Well-maintained with rest houses every few miles. Gradual but relentless climb out of the canyon.
- Water Sources: Available seasonally at Indian Garden, 3-Mile Resthouse, and 1.5-Mile Resthouse.
- Highlights: Shady spots at Indian Garden, classic Grand Canyon vistas near the rim.
South Kaibab Trail (South Rim)
- Distance: 7 miles from Phantom Ranch to South Kaibab trailhead (no water along trail!)
- Description: Steep and exposed; best used for descending due to lack of water and shade. Views are epic but there’s no escape from the sun.
- Water Sources: None—carry plenty!
- Highlights: Panoramic views almost every step of the way; Ooh Aah Point is a must-see photo stop.
Navigational Tips for Backpackers
- Campsites & Permits: Reserve well in advance! Popular overnight stops include Cottonwood Campground (north), Bright Angel Campground (bottom), and Indian Garden (south).
- Mileage Planning: Don’t underestimate the effort—miles here feel much tougher than on flat ground. Plan your itinerary based on fitness and daylight hours.
- Way-Finding: Trails are clearly marked but always bring a map or download GPS tracks—especially if you’re starting before sunrise or finishing after dark.
- Pace Yourself: The climb out is no joke! Hydrate often and take breaks in shaded areas when possible.
- Cultural Tip: It’s common to greet fellow hikers with a friendly “How’s it going?” or “Enjoy your hike!” on the trail.
Easily Missed Essentials Along the Way
- Bottle Fill-Ups: Always check which water sources are turned on before your trip by visiting the official Grand Canyon National Park website.
- Sunscreen & Hat: The Arizona sun is unforgiving—wear protection even if it’s cloudy.
- LNT Principles: Practice Leave No Trace—pack out all trash and avoid shortcutting switchbacks.
4. Staying Safe and Healthy
Hydration: The Grand Canyon Essential
Staying hydrated is the number one priority on a Rim-to-Rim backpacking trip. The dry desert climate and steep elevation changes can quickly lead to dehydration. Always carry enough water for each section of your hike, and know where the refill stations are located along the trail. Most hikers need at least 1 liter per hour in hot conditions.
| Trail Section | Water Availability | Notes |
|---|---|---|
| North Kaibab Trailhead to Cottonwood Campground | Seasonal water only at trailhead & campground | Check availability before your trip |
| Cottonwood Campground to Phantom Ranch | Phantom Ranch has year-round potable water | Bring a filter as backup |
| Phantom Ranch to South Rim (Bright Angel Trail) | Water available at Indian Garden, 3-Mile Resthouse, 1.5-Mile Resthouse (seasonal) | South Kaibab Trail has no water sources |
Managing Heat and Sun Exposure
The canyon’s temperatures can soar above 100°F (38°C) in the summer. Start hiking early, rest in the shade during midday, wear a wide-brimmed hat, lightweight long sleeves, and use plenty of sunscreen. Electrolyte tablets or powder can help prevent heat cramps and hyponatremia.
Packing Tips for Heat Management:
- Lightweight, moisture-wicking clothing
- Sunscreen (SPF 30+)
- Sunglasses with UV protection
- Cooling neck gaiter or bandana (soak in creek water when possible)
- Electrolyte supplements
Dealing with Wildlife: Be Canyon Smart
You may encounter mule deer, bighorn sheep, squirrels, ravens, and even rattlesnakes. Never feed wildlife—human food harms them and creates safety issues for future hikers. Store all food and scented items in animal-proof containers or provided lockers at campgrounds.
If You See a Rattlesnake:
- Keep a safe distance (at least 6 feet)
- Do not attempt to move or disturb it
- Let it move away on its own before passing by
Leave No Trace Principles for the Grand Canyon
The Grand Canyon is a national treasure. Help preserve its beauty by following these Leave No Trace (LNT) guidelines:
- Plan Ahead and Prepare: Know regulations and weather conditions.
- Travel and Camp on Durable Surfaces: Use established trails and campsites.
- Dispose of Waste Properly: Pack out all trash. Use toilets where available; otherwise, follow backcountry sanitation rules.
- Leave What You Find: Don’t take rocks, plants, or historic artifacts.
- Minimize Campfire Impact: Use stoves instead of fires; fires are often prohibited.
- Respect Wildlife: Observe animals from a distance.
- Be Considerate of Other Visitors: Keep noise down and yield the trail when appropriate.
Canyon First Aid Must-Knows
A basic first aid kit is essential for every hiker. Know how to treat blisters, heat exhaustion, dehydration, minor cuts, and sprains. Cell service is unreliable below the rim, so you’ll need to be self-sufficient until you reach help or a ranger station.
Packing List: Basic First Aid Kit for Grand Canyon Backpackers
| Item | Description/Use |
|---|---|
| Moleskin/blister pads | Treat hotspots before they become blisters |
| Bandaids & gauze pads | Cuts and scrapes management |
| Ace wrap or compression bandage | Ankle/knee support for sprains or strains |
| Aspirin/Ibuprofen/Tylenol | Pain relief and inflammation reduction |
| Tweezers & small scissors | Ticks or splinters removal; cutting tape/gauze |
| EpiPen (if prescribed) | Anaphylactic reactions (check with your doctor) |
| Sunscreen & lip balm with SPF | Sun protection essentials |
| A few electrolyte tablets/powder packets | Treating dehydration/heat illness |
The Grand Canyon’s challenges are real—but being prepared makes all the difference! Stay alert, stay hydrated, respect the environment, and you’ll have an unforgettable Rim-to-Rim adventure.
5. Logistics and Post-Hike Recovery
Arranging Transportation and Shuttles
Getting to and from the Grand Canyon Rim-to-Rim trail can be a bit tricky, so it’s smart to plan ahead. Most hikers start at either the North Rim or South Rim, but since these rims are about 200 miles apart by road, you’ll need to organize transportation.
Popular Shuttle Options
| Shuttle Service | Route | Reservation Needed? |
|---|---|---|
| Trans-Canyon Shuttle | North Rim ↔ South Rim | Yes |
| Xanterra South Rim Shuttle | Within South Rim Village | No |
| Arizona Shuttle (Groome) | Phoenix/Flagstaff ↔ Grand Canyon Village | Yes |
If you have two vehicles, some groups will leave one car at the end point and drive another to the starting rim. Otherwise, booking a shuttle is your best bet. Always reserve early, especially in peak season (late spring through early fall).
Resupplying Along the Way
The Grand Canyon is remote, so you won’t find traditional resupply points on the trail itself. If you need extra food or gear before or after your hike, both rims offer basic services:
- South Rim: General store, market plaza, and outdoor supply shops are available in Grand Canyon Village.
- North Rim: A small general store and campground store operate during the main season (mid-May to mid-October).
- Phantom Ranch: Limited snacks and drinks; advance reservations required for meals.
Where to Stay Before and After Your Hike
A good night’s rest before you hit the trail—and a comfy bed after—can make all the difference. Here are some popular places to stay near each rim:
| Location | Lodging Options |
|---|---|
| South Rim | Xanterra lodges (Bright Angel, El Tovar), Mather Campground, Tusayan hotels just outside the park gate |
| North Rim | Grand Canyon Lodge (seasonal), North Rim Campground, Kaibab Lodge (outside park) |
| Flagstaff/Williams | Boutique hotels, motels, hostels for pre- or post-hike stays with more amenities |
The Best Ways to Recharge After Your Adventure
- Treat Yourself to a Hearty Meal: Enjoy classic American fare at restaurants in Grand Canyon Village or try local spots in Flagstaff.
- Soothe Sore Muscles: Many area hotels have hot tubs or pools—perfect for a post-hike soak.
- Mental Recharge: Take time to reflect on your achievement over coffee at a rim-side café or journal your experience while watching the sunset.
- Cultural Sites: Visit museums or historic sites like the Kolb Studio or Desert View Watchtower for a dose of culture before heading home.
- Laundry & Showers: Both rims offer coin-operated laundry and shower facilities if you want to freshen up before traveling onward.
With a little planning around transportation, supplies, and relaxation, your Grand Canyon Rim-to-Rim adventure will be smooth from start to finish!