1. Assessing Trail Conditions Before You Go
Before heading out on a hike, especially after heavy rain or during flood season, it’s crucial to check the latest trail conditions. Being prepared helps you avoid dangerous situations and ensures a safer adventure for everyone. Here’s how you can stay informed and make smart decisions before you hit the trail.
Check Reliable Sources for Updates
Start by gathering information from trustworthy organizations that regularly update trail status and weather alerts. In the United States, some of the best sources include:
| Source | Type of Information Provided | How to Access |
|---|---|---|
| National Park Service (NPS) | Trail closures, hazard warnings, park alerts | nps.gov |
| Local Ranger Stations | Up-to-date local trail conditions, safety tips | Visit in person or call ahead |
| State Parks Websites | Weather advisories, regional closures | Check your state’s park website |
| NOAA Weather Alerts | Current weather conditions, flood warnings | weather.gov |
| Trail Associations (e.g., Appalachian Trail Conservancy) | User-submitted reports, maintenance updates | Organization websites or social media pages |
What to Look For Before You Go Hiking
- Trail Closures: Some trails may be temporarily closed due to washouts or flooding—respect these notices for your safety.
- Hazard Warnings: Look out for alerts about washed-out bridges, unstable slopes, or areas prone to flash floods.
- Weather Forecasts: Sudden storms can quickly change trail conditions. Always double-check the forecast right before your trip.
- User Reports: Recent feedback from other hikers can offer valuable insights on real-time conditions.
Quick Tip: Save Emergency Numbers on Your Phone
Add the local ranger station phone number and park emergency contacts to your phone before leaving home. This way, if you run into trouble or need an update while on the go, help is just a call away.
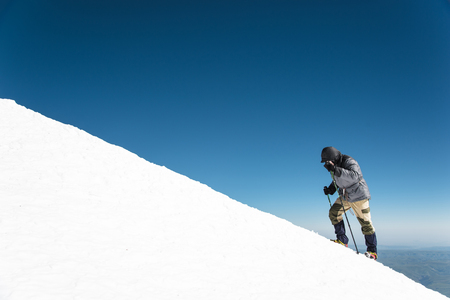
2. Recognizing Hazards and Reading the Landscape
When you’re out on a trail that’s been impacted by heavy rain or flooding, knowing how to spot hazards can make all the difference in your safety. Here’s how to recognize warning signs and read the landscape like an experienced American hiker.
Spotting Erosion and Unstable Ground
Erosion is common after storms and can create unstable ground, hidden drop-offs, or loose rocks. Watch for:
| Sign | What It Means | What To Do |
|---|---|---|
| Fresh cracks in the trail | The soil may be unstable and prone to collapse. | Avoid walking close to edges; look for a safer route. |
| Exposed tree roots or rocks | The top layer of soil has washed away. | Step carefully—ground may be slippery or loose. |
| Muddy patches with footprints sinking deep | The area is waterlogged and could give way under weight. | Test ground with trekking poles or walk around if possible. |
Identifying Flooded Sections and Fast-Moving Water
Flooded trails aren’t just inconvenient—they can be dangerous. Here’s what to look for:
- Water covering the trail: Even shallow-looking water can hide deep holes or swift currents. If you can’t see the bottom clearly, it’s best to turn back.
- Fast-moving streams: Water moving faster than you can comfortably walk is powerful enough to knock you off your feet. Don’t attempt to cross unless you’re absolutely sure it’s safe.
- Washed-out bridges: If a bridge looks damaged or partially collapsed, don’t risk crossing—it might not support your weight.
Common Flood Hazards on U.S. Trails
| Hazard | Description | Potential Risk |
|---|---|---|
| Overflowing creeks/rivers | Banks have burst, covering parts of the trail. | Drowning, getting swept downstream, hypothermia. |
| Landslides or mudslides | Mud and debris blocking or covering the path. | Serious injury from falling debris or being trapped. |
| Broken boardwalks/bridges | Wooden structures visibly damaged or missing planks. | Falling through, sprained ankles, serious falls. |
Quick Tips for Safe Trail Navigation After Heavy Rain:
- If in doubt, turn around—no view is worth risking your life for!
- Trekking poles help test muddy spots before stepping forward.
- Pace yourself; slow and steady is the way to go when trails are unpredictable.
- If hiking in a group, communicate about hazards so everyone stays alert.

3. Essential Gear and Preparedness Tips
Navigating washed-out or flooded trails in the U.S. requires a bit more planning and the right gear to stay safe and comfortable. Here’s what you need to know before you head out:
Must-Have Equipment for Wet & Muddy Trails
| Gear | Why It Matters | American Trail Recommendations |
|---|---|---|
| Sturdy, Waterproof Footwear | Keeps feet dry, offers grip on slippery surfaces | Look for high-ankle hiking boots with Gore-Tex or similar waterproofing; avoid basic sneakers |
| Trekking Poles | Improves balance on uneven, muddy ground | Adjustable poles with mud baskets are ideal for U.S. forest and mountain trails |
| Extra Layers | Helps regulate body temperature if weather shifts suddenly | Synthetic base layers, fleece mid-layers, and a packable rain jacket work best for changing conditions |
| Waterproof Gear (Jacket & Pants) | Protects from rain, splashes, and wind chill | PVC-free rain jackets/pants are recommended for eco-friendly adventuring; check local REI or outdoor retailers for options |
| Dry Bag/Zip-Lock Bags | Keeps electronics and essentials safe from water damage | Popular with American hikers—store your phone, wallet, and maps inside your pack using these bags |
| First Aid Kit & Emergency Blanket | For minor injuries or getting stuck due to flooding | A compact kit with bandages, antiseptic wipes, and a lightweight emergency blanket is standard trail safety gear in the U.S. |
Packing Smart: What Else to Consider?
- Hydration: Bring extra water—wet trails can mean longer hike times. An insulated bottle helps in cold weather.
- Nourishment: Pack high-calorie snacks like granola bars or trail mix for energy boosts.
- Navigation: Download offline maps on your phone (apps like AllTrails are popular) and carry a paper backup just in case.
- Headlamp or Flashlight: Early sunsets or cloud cover on stormy days can make trails darker than expected.
- Duct Tape: A roll can be a lifesaver for quick boot repairs or patching torn gear until you get home.
- Gaiters: These keep mud and debris out of your boots—great for hiking in American parks like the Pacific Northwest where wet conditions are common.
Trekking Tip:
If you’re new to hiking in challenging conditions, practice at a local park before taking on remote backcountry trails. Many state and national parks offer ranger-led hikes where you can learn firsthand about safe trail navigation and gear use.
Your Safety Comes First!
No matter how prepared you are, always check weather forecasts, trail reports, and park advisories before heading out. Let someone know your plans—and remember: when in doubt, turn around. Trails will still be there next time!
4. Safe Crossing Techniques and Detour Strategies
Assessing the Situation
Before you try to cross a washed-out or flooded trail, take a moment to evaluate your surroundings. Ask yourself:
- How deep and fast is the water?
- Is the current strong enough to knock you off balance?
- Can you see the bottom clearly?
- Are there obvious hazards, like loose rocks, debris, or unstable banks?
Safe Water Crossing Techniques
| Technique | Steps |
|---|---|
| Scout for a Better Spot | Look upstream and downstream for wider, shallower areas with gentle banks. Avoid narrow spots where water moves fastest. |
| Unbuckle Your Pack | Loosen straps so you can easily remove your pack if you fall. This helps prevent getting pinned underwater. |
| Use Trekking Poles or a Sturdy Stick | Test each step before committing your weight. Place poles or sticks downstream for extra stability. |
| Face Upstream & Move Sideways | Keep your body angled toward the current. Shuffle sideways slowly for better control and balance. |
| Cross as a Group (if possible) | If hiking with others, link arms or hold onto shoulders for mutual support—move together in a line facing upstream. |
Detour Strategies: Finding Alternative Routes
- If crossing isn’t safe, never force it. Look for established reroutes, bridges, or higher ground.
- Check for official detour signs posted by park rangers or trail crews. These are there for your safety!
- If you must go off-trail, follow durable surfaces like rocks or gravel to minimize damage to plants and soil.
- Avoid creating new paths that could lead to erosion or harm local ecosystems.
Leave No Trace Principles Matter
Navigating around flood damage means respecting nature and other hikers. Stick to these Leave No Trace basics:
- Travel on durable surfaces whenever possible.
- Avoid widening trails or trampling vegetation.
- Packed out what you bring in—don’t leave trash behind on reroutes.
Respect Trail Closures and Reroutes
If you encounter closed sections of trail, respect the signage and don’t attempt to bypass barriers. Trail crews close these areas for good reasons—safety hazards, ongoing repairs, or protecting sensitive environments. Choosing the right route protects both you and the outdoors for everyone’s future adventures!
5. Emergency Planning and Reporting Trail Issues
When you’re out on washed-out or flooded trails, having an emergency plan can make all the difference. These types of conditions can change quickly, so being prepared is key. Here’s how to get ready for anything that might happen:
Create a Communication Plan
Before you hit the trail, decide how you’ll keep in touch with others. Cell service isn’t always reliable in remote areas, so bring a backup like a satellite messenger or a personal locator beacon (PLB) if you’re heading far out. Make sure everyone in your group knows what to do if you get separated.
Share Your Itinerary
Always let someone know your plans before you leave. Tell a friend or family member where you’re going, your planned route, who’s with you, and when you expect to be back. This info is crucial if search and rescue needs to find you.
| Information to Share | Why It Matters |
|---|---|
| Your route & trail name | Helps rescuers know where to look |
| Departure & return times | Alerts others if youre overdue |
| Names of group members | Ensures everyone is accounted for |
| Emergency contact info | Makes it easier for authorities to reach loved ones |
Know How to Contact Local Search and Rescue
If something goes wrong, time matters. Look up the local search and rescue numbers or sheriff’s office before your trip—these are often posted at popular trailheads or park websites. Save them in your phone and write them down somewhere waterproof just in case.
How to Report Trail Hazards
If you spot dangerous washouts, deep water crossings, or other hazards on the trail, report them to the local land management agency or ranger station as soon as possible. This helps keep everyone safe and lets crews fix problems faster. Take note of the exact location and describe the issue clearly—photos can help too if it’s safe to take them.