1. Understanding the Link Between Asthma and High Altitude
If you have asthma and love exploring the great outdoors, you may wonder how hiking at higher elevations in the U.S. could affect your breathing. Altitude changes can influence respiratory health, and it’s important to understand what to expect before heading out on a mountain adventure.
How Does Altitude Affect Breathing?
As you climb higher, the air gets thinner. This means there is less oxygen available with every breath you take. For most people, this just feels like a little extra effort. But for those with asthma or other respiratory conditions, it can trigger symptoms or make them worse.
| Elevation (feet above sea level) | Oxygen Level Compared to Sea Level | Common Symptoms for Asthma |
|---|---|---|
| Sea Level (0-1,000 ft) | 100% | Normal breathing |
| Moderate (5,000-8,000 ft) | ~75-80% | Slight shortness of breath, mild fatigue |
| High (8,000-12,000 ft) | ~65-75% | Increased coughing, wheezing, chest tightness |
| Very High (>12,000 ft) | <65% | Frequent asthma symptoms, need for medication |
Common Challenges for People With Asthma at Higher Elevations
- Dry Air: Mountain air is usually drier, which can irritate your airways and make asthma symptoms more likely.
- Pollen and Allergens: Certain plants only grow at higher altitudes in places like Colorado or California’s Sierra Nevada. New allergens can surprise your lungs.
- Cold Temperatures: It often gets chillier as you go up. Cold air can trigger bronchospasms or make it harder to breathe if you’re sensitive.
- Physical Exertion: Hiking uphill requires more effort and energy than walking on flat ground. If you’re not used to it, your lungs may work overtime.
What to Expect When Hiking in the U.S.
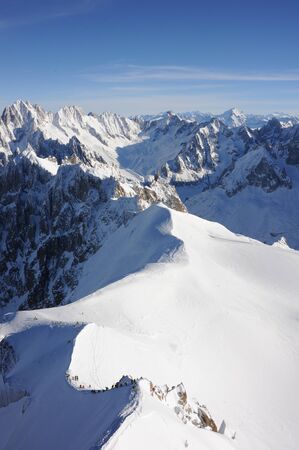
The United States has some of the world’s most beautiful high-altitude hiking destinations—from Rocky Mountain National Park in Colorado to Mount Whitney in California. Whether you’re tackling a 14er or enjoying a scenic trail above tree line, be aware that your asthma might react differently than it does at home. Always check elevation levels before you go and plan for slower hikes if needed.
2. Pre-Hike Preparation and Medical Planning
Talk to Your Healthcare Provider
Before heading out on your hike, especially if you plan to tackle higher elevations, it’s important to have an open conversation with your healthcare provider. Ask them about how altitude might affect your asthma or other respiratory conditions. They can help you understand what symptoms to watch for and may suggest a change in your medication plan for the trip. Be sure to let them know the elevation you plan to reach and the duration of your hike.
Pack Essential Medications and Devices
Your backpack should be ready for any scenario. Always bring more medication than you think youll need, just in case your hike takes longer or conditions change. Here’s a simple checklist to help you pack smart:
| Item | Why You Need It |
|---|---|
| Rescue Inhaler (e.g., albuterol) | For immediate relief if symptoms flare up |
| Maintenance Inhaler (if prescribed) | To keep symptoms under control during your hike |
| Spacer Device | Makes inhalers more effective, especially at higher altitudes |
| Peak Flow Meter | Helps monitor lung function before and during the hike |
| Written Asthma Action Plan | Quick guide for managing symptoms or emergencies on the trail |
| Medical ID Bracelet or Card | Important info for first responders in case of emergency |
Know Your Personal Triggers
Everyone’s asthma triggers are different. Altitude, cold air, pollen, dust, and increased physical exertion can all play a role in making symptoms worse. Before your trip, try to identify which triggers affect you most. If possible, check local air quality reports and pollen counts for your hiking destination.
Common Altitude-Related Triggers to Watch For:
- Cold or dry air: Breathing in cold, dry mountain air can make airways tighten.
- Pollen and allergens: High mountain meadows may be beautiful but can have lots of pollen.
- Dust and smoke: Trails can get dusty or smoky during dry seasons and wildfire events.
- Physical exertion: Hiking uphill at elevation is tough—don’t push yourself too hard.
Pro Tip: Practice Using Your Gear Before You Go!
If you use a spacer or peak flow meter, make sure you’re comfortable using them outside of home. Practice using them while wearing your hiking pack so it feels natural when you’re on the trail.
3. Selecting the Right Trail and Hiking Pace
Tips for Choosing Asthma-Friendly Trails
When you have asthma or other respiratory conditions, picking the right hiking trail is key to having a safe and enjoyable experience. Here are some simple tips to help you choose:
- Start with easy trails: Look for trails labeled “easy” or “beginner friendly.” These usually have gentler slopes and fewer sudden elevation changes.
- Check elevation gain: Choose trails with lower elevation gains (less than 500 feet per mile) to reduce stress on your lungs.
- Avoid high pollen areas: If you’re sensitive to pollen, research local pollen forecasts and avoid heavily wooded or grassy areas during peak seasons.
- Stay close to amenities: Pick trails near visitor centers or ranger stations in case you need help.
- Look for loop trails: Loops bring you back to your starting point without retracing your steps, making it easier if you need to cut your hike short.
Recognizing Different U.S. Hiking Terrains
The United States offers a variety of hiking terrains, each with unique challenges for those with respiratory issues. Here’s a quick comparison:
| Terrain Type | Main Features | Asthma Considerations |
|---|---|---|
| Desert (e.g., Arizona, Nevada) | Dry air, wide-open spaces, little shade | Low humidity can dry airways; bring extra water and cover your mouth with a scarf or buff |
| Mountain (e.g., Colorado Rockies) | High altitude, steep climbs, cooler temps | Thinner air may trigger symptoms; ascend gradually and rest often |
| Forest (e.g., Pacific Northwest) | Damp, shaded, lots of vegetation | Pollen and mold levels can be higher; check forecasts and consider antihistamines if needed |
| Prairie/Grassland (e.g., Midwest) | Open, windy, grassy fields | Pollen can be an issue in spring/summer; wear sunglasses and a mask if necessary |
| Coastal (e.g., California Coast) | Mild temps, salty air, moderate humidity | Easier breathing for most people; still check for allergens like coastal plants or molds |
Managing Your Hiking Pace for Respiratory Needs
Your hiking pace makes a big difference when managing asthma at altitude. Here’s how to set yourself up for success:
- Pace yourself: Go slower than usual—especially at the start. Let your body adjust as you hike.
- Take regular breaks: Stop every 15–20 minutes to catch your breath, hydrate, and check in on how you’re feeling.
- Breathe through your nose: This helps warm and filter the air before it reaches your lungs.
- Use the “talk test”: If you can’t speak in full sentences without gasping for air, slow down until talking feels comfortable again.
- Don’t push through symptoms: If you start wheezing or feel tightness in your chest, stop and rest. Use your inhaler as directed.
Your Personal Checklist Before Hitting the Trail:
- Select a trail that matches your comfort level and current fitness.
- Pace yourself according to how you feel—not just what’s posted on trail signs or apps.
- Carry all necessary medications in an easily accessible spot.
- Let someone know where you’re going and when you expect to return.
4. On-the-Trail Safety and Emergency Protocols
Monitoring Your Asthma on the Trail
Hiking at higher elevations can sometimes make asthma symptoms worse, so it’s important to keep a close eye on your breathing. One easy way to do this is by using a peak flow meter. This small device helps you measure how well air moves out of your lungs, letting you spot any early signs of trouble before they get serious.
How to Use a Peak Flow Meter While Hiking
| Step | What To Do |
|---|---|
| 1. Prepare | Stand up straight and set the marker to zero. |
| 2. Inhale Deeply | Take a deep breath in, filling your lungs completely. |
| 3. Exhale Fast | Blow out as hard and fast as you can into the mouthpiece. |
| 4. Record Reading | Note the number where the marker stopped. |
| 5. Repeat & Compare | Do this two more times, and record your best score. Compare it to your personal best or doctor’s recommendations. |
Recognizing Symptoms: What to Watch For
It’s vital to pay attention to your body while hiking, especially if you have asthma or another respiratory condition. Watch for these warning signs:
- Coughing, especially with activity or at rest
- Shortness of breath that doesn’t improve with rest
- Tightness in your chest or wheezing sounds when breathing out
- Trouble talking or walking due to breathing difficulty
- Lips or fingernails turning bluish (a sign of low oxygen)
Responding to Exacerbations on the Trail
If you notice any of these symptoms getting worse, take action right away:
- Stop and Rest: Find a safe spot off the trail, sit down, and try to stay calm.
- Use Your Rescue Inhaler: Take your quick-relief medication as prescribed by your doctor.
- Monitor Your Peak Flow: If possible, check your numbers with your peak flow meter to see if they improve after using your inhaler.
- Breathe Slowly: Focus on slow, steady breaths until you feel better.
- If No Improvement: If symptoms continue or worsen after 15 minutes and repeated inhaler use, it may be an emergency.
When and How to Seek Help on American Trails
| If You Experience… | You Should… |
|---|---|
| No relief from inhaler Severe shortness of breath Difficulty speaking or walking Bluish lips/fingernails Confusion or fainting |
– Call 911 (use a cell phone or ask someone nearby) – Use GPS coordinates if possible – Signal for help (whistle, waving bright clothing) – Stay put and conserve energy until help arrives |
Extra Tips for Staying Safe on U.S. Trails:
- Cary an emergency card listing your medical info, medications, and emergency contacts.
- If hiking in popular areas like national parks, know where ranger stations are located—they are trained for emergencies.
- If cell signal is weak, consider carrying a satellite messenger or personal locator beacon (PLB).
The key to hiking safely with asthma at altitude is preparation and knowing how to respond quickly if symptoms arise. Regular monitoring and clear action steps can make all the difference for a safe adventure in Americas great outdoors.
5. Post-Hike Recovery and Ongoing Management
Transitioning Safely Back to Lower Altitudes
After a rewarding hike at higher elevations, your body and lungs need time to readjust as you return to lower altitudes. Here are a few steps to make the transition smooth and safe for people with asthma or other respiratory conditions:
- Rest and Rehydrate: Give yourself plenty of time to rest and drink water. This helps your body flush out any toxins and recover from altitude-related stress.
- Monitor Your Symptoms: Keep an eye on how you’re feeling—especially your breathing. If you notice increased wheezing, coughing, or chest tightness, use your rescue inhaler as prescribed and inform someone if symptoms persist.
- Avoid Overexertion: Take it easy for a day or two after your hike. Allow your lungs time to fully adjust before jumping back into strenuous activity.
Caring for Your Lungs After Hiking
Your lungs work extra hard at high altitudes, so post-hike care is important. Here’s a simple table with tips to help your respiratory recovery:
| Lung Care Step | How It Helps |
|---|---|
| Steam Inhalation or Warm Showers | Helps clear airways and soothes irritated passages |
| Use Your Controller Medications | Keeps inflammation in check; stick to your asthma action plan |
| Avoid Smoke & Irritants | Prevents further lung irritation after exertion |
| Breathing Exercises (like pursed lip breathing) | Improves oxygen intake and calms shortness of breath |
| Check Peak Flow (if recommended by doctor) | Monitors your lung function post-hike for early warning signs |
Long-Term Respiratory Health for Active Hikers
If you love hiking and want to stay active with asthma or another respiratory condition, ongoing management is key. Here are some practical strategies:
- Regular Check-Ups: See your healthcare provider at least once a year—or more often if you notice changes in symptoms.
- Update Your Action Plan: Make sure your asthma action plan reflects your current medications and activity level. Carry a copy when hiking.
- Stay Educated: Know the signs of altitude sickness and be aware of how altitude impacts respiratory health. Don’t hesitate to turn back if needed.
- Pace Yourself: Choose trails that match your fitness level, and don’t feel pressured to keep up with others if you need to slow down.
- Join a Community: Many local hiking groups welcome members with health conditions—sharing experiences can boost confidence and provide support.
Your Post-Hike Checklist for Asthma & Altitude Adventures
- Hydrate and rest after every hike.
- Check for lingering symptoms like cough or wheeze.
- Follow your medication plan without skipping doses.
- Avoid smoky campfires or dusty areas during recovery.
- If in doubt, reach out to your doctor before planning the next hike!