1. Understanding Common Trail Emergencies
When you head out on a hiking adventure in the U.S., it’s important to know what types of emergencies you might face. Being aware of these common situations helps you get ready and stay safe while enjoying the great outdoors. Here’s a breakdown of the most frequent trail emergencies American hikers encounter:
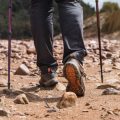
Injuries on the Trail
Accidents can happen, even on well-marked trails. Sprained ankles, cuts, scrapes, blisters, and even broken bones are some of the most common injuries. These often result from uneven terrain, slippery rocks, or just a simple misstep.
Severe Weather Conditions
The weather in America’s wild spaces can change quickly. Thunderstorms, extreme heat, sudden cold fronts, or heavy rain can turn a pleasant hike into a dangerous situation. Hypothermia and heat exhaustion are real risks depending on where you’re hiking and the season.
Wildlife Encounters
From bears in the Rockies to snakes in the Southwest and ticks carrying Lyme disease in the Northeast, wildlife encounters can be both exciting and risky. Knowing how to react if you spot a large animal or come across an insect hazard is crucial.
Getting Lost
Losing your way is one of the most stressful situations for any hiker. It can happen if you wander off marked paths, misread signs, or rely too much on electronic devices that run out of battery or lose signal.
Quick Overview: Common Trail Emergencies
| Emergency Type | Examples | Key Risks |
|---|---|---|
| Injuries | Sprains, cuts, falls, blisters | Pain, limited movement, infection |
| Severe Weather | Thunderstorms, heatwaves, cold snaps | Hypothermia, heat exhaustion, dehydration |
| Wildlife Encounters | Bears, snakes, insects (ticks/bees) | Bites, stings, disease transmission |
| Getting Lost | Losing trail markers, device failure | Panic, dehydration, exposure to elements |
By understanding these common emergencies before hitting the trail, you’re already taking an important first step toward being prepared for anything nature throws your way.
2. Essential Gear for Emergency Preparedness
Being ready for emergencies is a big part of responsible hiking in the U.S. Packing the right gear can make all the difference if things go sideways on the trail. Here’s a breakdown of must-have items every hiker should carry, following American hiking norms and best practices.
First Aid Kit
No matter how short your hike, a basic first aid kit is non-negotiable. It should include:
| Item | Why You Need It |
|---|---|
| Bandages & Gauze | Treat cuts, scrapes, or blisters |
| Antiseptic Wipes | Clean wounds to prevent infection |
| Tweezers | Remove splinters or ticks (common in U.S. woods) |
| Pain Relievers | Handle headaches, sprains, or minor pain |
| Allergy Medication (like Benadryl) | Address unexpected allergic reactions or insect bites |
| Moleskin or Blister Pads | Prevent and treat blisters—a common issue on American trails |
Navigation Tools
Getting lost is easier than you think, even on marked trails. Always pack:
- Paper Map & Compass: Electronics fail—traditional tools don’t need batteries.
- GPS Device or Smartphone with Offline Maps: Helpful in areas with spotty cell service (common in U.S. national parks).
- Whistle: For signaling if you’re lost; three blasts is the universal distress signal.
Survival and Shelter Items
If you get stuck overnight or weather turns bad, these basics are vital:
| Item | Description/Use Case |
|---|---|
| Emergency Blanket (Mylar) | Tiny and lightweight; keeps you warm if stranded. |
| Poncho or Rain Jacket | Sudden downpours are common in many U.S. climates. |
| Multi-tool/Knife | Cuts rope, repairs gear, opens food packaging. |
| Duct Tape (small roll) | Makeshift repairs for gear, clothing, or shelter. |
| Headlamp/Flashlight (plus extra batteries) | Nights come fast—especially under tree cover. |
| Fire Starter (matches/lighter/waterproof tinder) | Warmth and signaling for help if needed. |
Communication Devices
Your phone might not always have service out there. Consider packing:
- Cell Phone (with portable charger): Useful where coverage exists—keep it charged!
- Personal Locator Beacon (PLB) or Satellite Messenger: Sends SOS signals from anywhere in the backcountry—essential for remote U.S. hikes like those in the Rockies or Sierra Nevada.
- Whistle: Again, simple but effective for attracting attention.
Extra Essentials Tailored for U.S. Trails
| Item | Main Benefit on American Trails |
|---|---|
| Sunscreen & Sunglasses | The sun can be intense at high elevations and open spaces common in U.S. parks. |
| Bug Spray | Mosquitoes and ticks are prevalent in many states during warmer months. |
| Sufficient Water & Water Purification Tablets/Filter | Lakes and streams may look clean but often aren’t safe to drink without treatment. |
| Nutrient-rich Snacks | Keeps your energy up during long stretches—think trail mix, jerky, granola bars. |
| ID Card & Emergency Contact Info | If something happens to you, rescuers will know who you are and whom to call. |
Packing Tips for American Hikers
- The “Ten Essentials” system is popular in the U.S.—it covers everything above plus extras like sun protection and extra clothes.
- Packing light is great, but don’t sacrifice safety gear—even on familiar trails.
- If you’re hiking in bear country (like parts of Montana or Alaska), consider a bear spray canister as part of your emergency kit.
- Edit your kit seasonally—winter hikes require extra insulation and traction devices like microspikes.
A Quick Reference: What Goes in Your Day Pack?
| Category | Specific Gear Example(s) |
|---|---|
| First Aid & Health Safety | Bandaids, moleskin, tweezers, allergy meds |
| Shelter/Survival | Emergency blanket, headlamp, poncho/rain jacket |
| Navigation | Pocket map, compass, GPS unit/smartphone with offline maps |
| Sustenance | Nutrient-dense snacks, 2L+ water bottle/hydration reservoir |
| Communication | SAT messenger/PLB, charged cell phone, whistle |
| Bears/Wildlife Protection (if needed) | Bear spray canister (where recommended) |
| ID/Emergency Info | ID card with contact info in waterproof baggie |
This checklist will help keep you safer—and give peace of mind—while enjoying America’s amazing trails. Smart packing means you’ll be ready for whatever comes your way out there!

3. Building Fundamental Survival Skills
Key Survival Skills Every Hiker Should Know
Emergencies can happen on any trail, whether youre trekking the Pacific Crest Trail or exploring the Appalachian Mountains. Knowing a few basic survival skills can make all the difference if you find yourself in a tough spot. Here are some key skills and practical tips tailored to U.S. trails and terrains.
First Aid Essentials
Carry a first aid kit and know how to use it. Learn how to treat blisters, sprains, cuts, and insect bites—these are common issues on American trails. Consider taking a basic wilderness first aid course before heading out. Always check for ticks after hiking in wooded or grassy areas, especially in places like Shenandoah National Park where Lyme disease is a concern.
Basic Navigation Skills
Don’t rely solely on your phone; battery life can be unreliable in remote areas. Practice using a map and compass, and understand topographic maps for regions like Yosemite or the Rocky Mountains. If you’re hiking popular desert trails such as those in Joshua Tree National Park, pay attention to landmarks and always know your starting point.
Navigation Tools Comparison
| Tool | Strengths | Limitations |
|---|---|---|
| GPS Device | Easy to use; accurate location tracking | Batteries can die; may lose signal in dense forests or canyons |
| Map & Compass | No batteries needed; works anywhere | Takes practice to use correctly |
| Smartphone App | Convenient; many route options available | Batteries run out quickly; not always reliable offline |
Fire-Building Techniques
A fire can be crucial for warmth and signaling for help. In wet environments like the Pacific Northwest, pack waterproof matches or a reliable lighter. In drier regions such as Utah’s national parks, be cautious of fire bans due to wildfire risk—always check local rules before building any fire.
Quick Fire-Starting Tips:
- Keep tinder (cotton balls with petroleum jelly or dryer lint) in a waterproof bag.
- Practice building small fires at home so you’re confident outdoors.
- If permitted, use existing fire rings instead of making new ones to protect the landscape.
Signaling for Help
If you need rescue, knowing how to signal is essential. On well-traveled U.S. trails, a loud whistle (three blasts) is recognized as a distress call. Bright clothing or an emergency blanket can catch the eye of searchers from above—especially helpful in open areas like Colorado’s alpine tundra.
Common Signaling Methods Table:
| Method | Description/Use Case |
|---|---|
| Whistle (3 blasts) | Loud sound carries far—universal distress signal in North America. |
| Signal Mirror | Sends flashes of light visible over long distances on sunny days. |
| Bright Clothing/Emergency Blanket | Makes you more visible from helicopters or planes; lay flat in open area if possible. |
| Fire/Smoke Signals | If safe and permitted, smoke columns attract attention during daylight hours. |
Building these fundamental survival skills will help you stay safer and more confident no matter which U.S. trail you choose to explore.
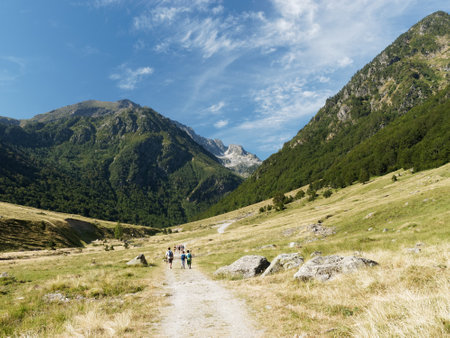
4. Establishing a Pre-Hike Safety Plan
Route Planning: Know Before You Go
Before you hit the trail, take time to plan your route carefully. Study maps and trail descriptions, check for recent updates or closures, and choose paths that match your experience level. If youre hiking in a national park or wilderness area, visit official websites for the latest information on trail conditions.
Key Questions for Route Planning
| Question | Why It Matters |
|---|---|
| How long is the hike? | Helps estimate time and energy needed. |
| What is the elevation gain? | Affects difficulty and preparation. |
| Are there water sources? | Determines how much water to carry. |
| Is there cell service? | Influences emergency communication plans. |
Leave Trip Details with a Trusted Contact
This is one of the most important steps for safety in the U.S. outdoor community. Always tell a friend or family member where you’re going, your planned route, expected start and finish times, and who is in your group. This way, if you don’t check in as scheduled, someone will know to alert authorities.
Sample Trip Information to Share
| Detail | Example |
|---|---|
| Trail Name/Location | Eagle Rock Loop, Ouachita National Forest |
| Date & Time In/Out | June 15, 8:00 AM – June 15, 6:00 PM |
| Planned Route | Main loop clockwise from Winding Stairs Trailhead |
| Group Members’ Names & Contacts | Sara Doe (555-1234), Mike Lee (555-5678) |
| Emergency Plan/Check-In Procedure | If no contact by 8:00 PM, call local search & rescue at (555-0000) |
Check Weather Conditions Before Heading Out
The weather can change fast on American trails—especially in mountain regions. Check the forecast from reliable sources like the National Weather Service or local ranger stations. Be aware of hazards like thunderstorms, extreme heat or cold, snow, and flash floods. Pack extra layers or rain gear as needed and consider postponing your hike if severe weather is expected.
Know Local Search and Rescue Procedures
If something goes wrong, knowing how search and rescue works can save precious time. In the States, call 911 for emergencies—cell service permitting—or use a satellite communicator if you’re out of range. Many parks have their own emergency numbers posted at trailheads or online. Stay put if lost; it’s easier for rescuers to find you. Make yourself visible with bright clothing or signal devices.
Quick Guide to U.S. Search & Rescue Steps:
- If lost: Stop moving and stay calm.
- Try calling 911 first.
- If no cell service: Use a satellite device or activate a personal locator beacon if available.
- If you left trip details: Your contact will notify authorities if you miss your check-in time.
- Make yourself seen: Use signals like mirrors, whistles, or waving brightly colored gear.
A solid pre-hike safety plan gives you peace of mind and helps ensure you’ll get help quickly if things go sideways out on the trail.
5. Responding Effectively to Emergencies
Step-by-Step Advice for Trail Emergencies
No matter how well you prepare, emergencies can still happen on the trail. Knowing how to respond quickly and calmly can make all the difference. Here’s a simple, step-by-step guide for handling unexpected situations in the U.S. wilderness.
Step 1: Stay Calm and Breathe
Panic can make things worse. Take a few deep breaths and focus on what needs to be done next. Reassure yourself and anyone with you that you’re going to handle the situation.
Step 2: Assess the Situation
Look around and determine what happened, who is involved, and if there are any immediate dangers (like falling rocks, unstable ground, or wildlife nearby). Ask these questions:
| Question | Why It Matters |
|---|---|
| Is anyone injured? | Helps prioritize first aid actions. |
| Are we safe where we are? | Avoids further danger from environment. |
| Do we have supplies handy? | Makes response faster and more effective. |
Step 3: Administer First Aid
If someone is hurt, use your first aid kit right away. Here’s a quick reference for common injuries:
| Injury | Action |
|---|---|
| Cuts & Scrapes | Clean wound, apply pressure, bandage. |
| Sprains & Strains | Rest, ice if available, compress with bandage, elevate limb. |
| Bites/Stings | Remove stinger if present, clean area, use antihistamine if needed. |
| Heat Exhaustion | Move to shade, give water, cool down body. |
| Hypothermia | Add dry layers, shelter from wind/rain, give warm drinks if alert. |
Step 4: Use Emergency Supplies Wisely
- Grab your emergency blanket or bivy sack for warmth if needed.
- Use signaling devices like whistles or mirrors to attract attention.
- If you have a satellite communicator or GPS device, check your location and prepare to send an SOS if necessary.
- If it’s dark or visibility is low, use your headlamp or flashlight so rescuers can spot you.
Step 5: Contact Authorities in the U.S. Wilderness
If the situation is serious or you’re unable to self-rescue:
- If you have cell service, call 911 and provide your exact location using coordinates if possible. Stay on the line until told otherwise.
- If no cell service is available but you have a satellite communicator (like a Garmin inReach or SPOT), use the SOS feature. Follow device instructions and stay put unless safety requires moving.
- If you must leave to get help, write down details about your location and situation for rescuers. Mark your path clearly as you go.
Key Info to Give When Contacting Help:
- Your exact location (GPS coordinates or trail landmarks)
- The nature of the emergency (injury/illness/lost/etc.)
- The number of people in your group and their conditions
- Your supplies and ability to shelter/wait for rescue
By following these steps and staying level-headed, you can greatly improve your chances of a positive outcome during any trail emergency in America’s backcountry.