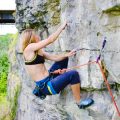
1. Choosing the Right Footwear
When it comes to hiking and backpacking in the rugged Rocky Mountain terrain, picking the right footwear can make or break your adventure. The Rockies are known for their rocky trails, sudden weather changes, and steep inclines, so your boots or shoes need to be up for the challenge. Let’s explore what features matter most.
Key Features to Look For
| Feature | Why It Matters | Pro Tips for the Rockies |
|---|---|---|
| Grip (Traction) | Keeps you steady on loose rocks, mud, and uneven ground | Look for deep, aggressive lugs designed for mixed terrain |
| Ankle Support | Prevents sprains and offers stability on steep climbs and descents | Mid or high-cut boots are best for backpacking with a heavy pack |
| Waterproofing | Protects feet from snowmelt, rain, and river crossings | GORE-TEX® or similar waterproof membranes keep moisture out but allow breathability |
| Cushioning & Comfort | Cushions feet against sharp rocks and long miles on trail | Try on boots with your hiking socks; consider extra toe room for descents |
| Durability | Ensures boots hold up against abrasive granite and scree fields | Full-grain leather or reinforced synthetic uppers last longer in harsh conditions |
Boots vs. Trail Shoes: What’s Best?
If you’re sticking to well-maintained trails with a light pack, trail shoes might do the trick. They’re lighter and dry faster if they get wet. But for multi-day trips, off-trail exploration, or carrying a heavy load, traditional hiking boots offer more support and protection.
Quick Comparison: Boots vs. Trail Shoes
| Hiking Boots | Trail Shoes | |
|---|---|---|
| Ankle Support | High/Medium | Low/None |
| Weight | Heavier | Lighter |
| Suits Rocky Terrain? | Yes (best choice) | If trails are well-maintained only |
| Packing Heavy? | Recommended | Avoid if carrying over 25 lbs (11 kg) |
| Break-in Needed? | Usually yes | No/minimal break-in time needed |
Tried-and-True Advice from Locals:
- The Rockies can throw every season at you in a single day—waterproof boots save your feet from sudden storms and slushy snowfields.
- If your hike involves scrambling or bushwhacking, solid toe protection is a must.
- Socks matter too! Pair your footwear with moisture-wicking merino wool or synthetic hiking socks to prevent blisters.
- Duct tape a small patch inside your pack—you’ll thank yourself if hotspots appear mid-hike!
- No matter what you choose, always break in new footwear before hitting any serious trail in the Rockies.
The right footwear keeps you safe, comfortable, and ready for whatever the Rocky Mountains throw your way. Choose wisely—your feet will thank you every step of the journey!
2. Layering for Mountain Weather
The weather in the Rocky Mountains can change in a heartbeat—sunshine one minute, rain or even snow the next. That’s why smart layering is key for any hiking or backpacking adventure in this region. Here’s what you need to know about clothing layers to stay comfortable, dry, and safe on the trail.
Understanding the Layering System
Layering is all about combining different types of clothing so you can add or remove pieces as the weather shifts. The basic system includes three main layers: base, mid, and outer (shell). Each has a specific job to do.
Essential Clothing Layers
| Layer | Purpose | Recommended Materials | Pro Tips |
|---|---|---|---|
| Base Layer | Wicks moisture away from skin | Synthetic fabrics (like polyester), merino wool | Avoid cotton; it holds moisture and chills fast |
| Mid-Layer | Adds insulation and traps body heat | Fleece, lightweight down, synthetic insulated jackets | Choose thickness based on season and altitude |
| Outer Shell | Protects against wind, rain, and snow | Waterproof/breathable jackets (GORE-TEX, eVent) | Pit zips or vents help regulate body temperature during activity |
Dressing for Changing Conditions in the Rockies
You might start your hike with cool mountain air, only to face intense sun at midday, sudden thunderstorms in the afternoon, or chilly winds above treeline. Always check the forecast before heading out, but be ready for surprises by packing versatile layers.
- Mornings: Start with all your layers—base, mid, and shell—for warmth.
- Afternoons: Shed mid-layer as temps rise; keep your shell handy for pop-up showers or gusty winds.
- Nights: Add extra insulation like a puffy jacket if camping or hiking late.
Packing Tips for Rocky Mountain Hikes
- Keep an extra pair of dry socks in your pack—wet feet are common and uncomfortable.
- A brimmed hat and sunglasses help protect from high-altitude sun exposure.
- If thunderstorms are likely, a compact rain jacket is worth its weight in gold.
- A lightweight buff or neck gaiter adds warmth and shields your face from wind or dust.
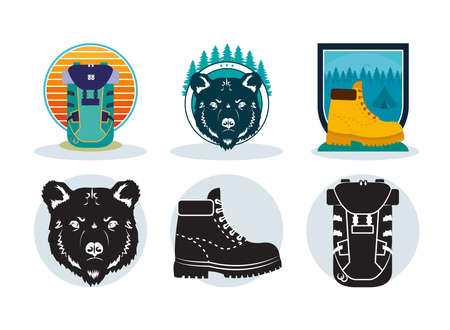
3. Backpacks and Packing Essentials
Choosing the Right Backpack for Rocky Mountain Adventures
Picking the right backpack is key for comfort and safety while hiking or backpacking in the Rockies. The type of pack you need depends on your trip length and what you plan to carry. Here’s a quick breakdown:
| Backpack Type | Best For | Capacity (Liters) | Main Features |
|---|---|---|---|
| Daypack | Short hikes (half-day to full day) | 15-30L | Lightweight, hydration sleeve, small pockets for snacks & essentials |
| Overnight Pack | 1-2 night trips | 35-50L | Padded hip belt, multiple compartments, room for extra layers & food |
| Multi-Day Pack | 3+ night treks or thru-hikes | 55-75L+ | Adjustable suspension, load lifters, large capacity for gear & bear canister |
Packing Smart: Balancing Weight and Readiness
The Rockies’ rugged terrain means you need to be prepared—without overloading your pack. A well-packed bag keeps essentials accessible and weight distributed evenly.
Packing Tips for Rocky Mountain Trails:
- Keep Heavy Items Centered: Place your heaviest gear (like water and food) close to your back and centered between your shoulders for better balance.
- Layer by Use: Store items you’ll use during the day (rain jacket, snacks, map) near the top or in outer pockets so you don’t have to dig around.
- Bare Essentials Only: Stick to the “Ten Essentials” (navigation, sun protection, insulation, etc.) plus anything specific for your route—don’t bring extras that add weight.
- Water Management: Carry enough water but know where refill points are. Hydration reservoirs make sipping on the go easy.
- Bears and Critters: In many parts of the Rockies, pack a bear canister or Ursack for food storage. Hang your food if required by local regulations.
Quick Checklist: What to Pack?
| Item Category | Examples |
|---|---|
| Shelter & Sleep System | Tent/tarp, sleeping bag, pad (if overnight) |
| Navigation & Tools | Map, compass/GPS, multitool, headlamp/extra batteries |
| Food & Water Supplies | Treats/energy bars, meals, water filter/purifier, bottles/reservoirs |
| Weather Protection | Puffy jacket/fleece, rain shell, gloves, hat/sun hat |
| Sunscreen & First Aid | Sunscreen/lip balm, bug spray, first aid kit/blister care |
| Bears/Wildlife Safety Gear | Bear canister/Ursack, bear spray (check local rules) |
| Trekking Poles (optional) | Aid with steep climbs/descents and stream crossings |
The right backpack and smart packing will help you handle everything from sudden weather changes to wildlife encounters while keeping your hike enjoyable and safe in the stunning Rocky Mountains.
4. Navigation and Safety Tools
Essential Navigation Gear for the Rockies
When exploring the Rocky Mountains, reliable navigation gear is a must. Trails can be confusing, weather can change quickly, and cell service is often spotty. Here’s a quick look at the must-have tools every hiker and backpacker should pack:
| Navigation Tool | Purpose | Why It Matters in the Rockies |
|---|---|---|
| Topographic Map | Shows terrain, trails, and landmarks | Critical for understanding elevation changes and finding your route when signs are scarce |
| Compass | Basic direction-finding tool | Works without batteries or signal; pairs well with a map for traditional navigation |
| GPS Unit | Tracks your location using satellites | Provides real-time position info even in remote areas where phones might fail |
| Smartphone GPS Apps (offline maps) | Digital maps on your phone or tablet | Convenient backup if you download maps ahead of time; always bring an extra battery pack! |
Safety Tools for Remote Terrain
The Rockies can feel wild and isolated—which is part of their charm. But with remoteness comes risk. These safety items help keep you connected and prepared:
| Safety Tool | Main Function | How It Helps in Mountain Terrain |
|---|---|---|
| Personal Locator Beacon (PLB) | Sends SOS signals via satellite to rescuers | A lifesaver in emergencies, especially far from cell towers—activates with just one button press |
| Satellite Messenger (like Garmin inReach) | Sends messages and SOS alerts from anywhere | Keeps friends and family updated or lets you check in with search & rescue if needed; some allow two-way texting even off-grid |
| Whistle & Signal Mirror | Makes noise or flashes light to attract attention | No batteries required; small but very effective for signaling your location to others nearby or search teams overhead |
Packing Tips for Navigation & Safety Gear
- Laminated map: Protects against rain and tearing.
- Keep compass easily accessible: Attach it to your backpack strap or store in a hip belt pocket.
- Test GPS units before you leave home: Make sure they’re updated with current maps of your hiking area.
- Cary backup power: Extra batteries or a portable charger can save the day for electronic devices.
- Ditch the single-solution mindset: Always have both digital and analog options.
The Bottom Line: Know Your Tools Before You Go!
Navigating the Rocky Mountains safely means being prepared for anything. Practice using all your tools before hitting the trail—so when conditions get tough, you’ll know exactly what to do.
5. Water Filtration and Hydration Strategies
Staying Hydrated in the Rockies
When you’re hiking or backpacking in the Rocky Mountains, water is everything. The dry air, high elevation, and long days on the trail can zap your hydration fast. Carrying enough water is important, but equally critical is having a solid plan for filtering and refilling as you go. Here’s how to make sure you stay hydrated and healthy during your adventure.
Portable Water Filtration Systems: What Works Best?
Not all water sources are safe to drink straight from the stream. Portable filters help protect you from bacteria, protozoa, and even some viruses. Here’s a quick review of popular systems:
| Filtration System | Pros | Cons |
|---|---|---|
| Pump Filters (e.g., MSR MiniWorks) | Reliable, good for groups, works with dirty water | Heavier, requires effort to pump |
| Squeeze Filters (e.g., Sawyer Squeeze) | Lightweight, fast, easy to use solo | Can clog if not cleaned regularly |
| SteriPEN (UV Purifiers) | Treats water quickly, no pumping required | Batteries needed, doesn’t remove sediment |
| Chemical Treatments (AquaMira drops/tablets) | Ultra-lightweight, no moving parts | Takes time to work, leaves taste |
| Gravity Filters (Platypus GravityWorks) | No pumping needed, good for basecamp or groups | Bulky for solo hikers, slower fill rate than squeeze systems |
Hydration Reservoirs vs. Water Bottles
The choice between hydration bladders and classic bottles comes down to comfort and convenience. Hydration reservoirs (like CamelBak) let you sip hands-free while hiking—great for keeping your pace up on steep climbs. Bottles are easier to refill at streams and let you keep tabs on how much you’ve drunk so far.
Quick Comparison:
| Reservoirs/Bladders | Bottles (Nalgene, Smartwater) | |
|---|---|---|
| Hands-Free Use | Yes | No |
| Easy to Clean | No (can be tricky) | Yes |
| Packs Easily in Backpack Pockets | No (usually inside main compartment) | Yes |
Smart High-Altitude Hydration Tips
- Drink early and often: Don’t wait until you’re thirsty; by then you might already be dehydrated.
- Aim for at least half a liter per hour of moderate activity—more if it’s hot or you’re working hard.
- Add electrolytes: Powdered mixes like Nuun or Liquid I.V. help replace salts lost through sweat.
- If you use a bladder system in cold weather, blow air back into the tube after drinking so it doesn’t freeze up.
- Always carry a backup filter or chemical treatment in case your primary system fails.
Pro Tip:
If water sources look scarce on your planned route, call local ranger stations ahead of time—they’ll often have updated info about stream flows and snowmelt conditions.
6. Food and Nutrition for the Trail
Fueling Up for Rocky Mountain Adventures
When hiking or backpacking in the Rockies, your body burns a lot of calories—especially at higher elevations. Having the right food is key to keeping your energy up and enjoying the journey. Here’s how to pick calorie-dense snacks, prep easy meals, and keep your food safe from bears and critters.
Calorie-Dense Snacks for Maximum Energy
| Snack | Why It Works | Pro Tip |
|---|---|---|
| Trail Mix (nuts, seeds, dried fruit, chocolate) | Packed with healthy fats, protein, and sugars for sustained energy. | Make your own mix to control ingredients and flavor. |
| Nut Butter Packets | High in calories and easy to eat on the go. | Squeeze onto crackers or eat straight from the packet. |
| Jerky (beef, turkey, vegan options) | Lightweight source of protein and salt. | Look for low-sodium varieties if you’re concerned about dehydration. |
| Granola or Energy Bars | No-cook option loaded with carbs and fats. | Choose bars with 200+ calories each for long days. |
| Cheese or Hard Sausage | Adds variety, fat, and protein; keeps well in cooler temps. | Slices pair well with crackers or tortillas for a quick meal. |
Easy Trail Meals for the Rockies
- Instant Oatmeal: Great breakfast that just needs hot water. Add dried fruit or nut butter for extra calories.
- Tortilla Wraps: Fill with tuna packets, hummus, or hard cheese. Tortillas pack flat and don’t crumble like bread.
- Dehydrated Dinners: Lightweight “just add water” meals are popular among backpackers. Try brands like Mountain House or Backpacker’s Pantry.
- Couscous or Instant Rice: Cooks quickly and can be mixed with freeze-dried veggies and pre-cooked chicken packets for an easy hot meal.
- Soup Packets: Warm up fast when temperatures drop at elevation—add crackers or extra instant rice for more bulk.
Bears & Critters: Safe Food Storage in the Rockies
The Rocky Mountains are home to both black bears and grizzlies. Storing food properly is essential to keep wildlife (and yourself) safe. Here’s what you need to know:
Bearsafe Storage Techniques
- Bear Canisters: Required in many parts of Rocky Mountain National Park and other wilderness areas. They’re heavy but very effective—store all scented items inside overnight.
- Bare Bags & Ursacks: Lighter than hard canisters, these are made from bear-resistant fabric. Always tie securely to a tree away from camp at least 12 feet high and 6 feet out from the trunk (the “counterbalance” method).
- No Food in Tents: Never store food, trash, or toiletries where you sleep—even empty wrappers attract animals!
- Campsite Selection: Set up your cooking/eating area at least 100 yards from your sleeping area (“bear-muda triangle” rule).
- Packing Out Trash: Bring all food scraps and packaging back out with you—leave no trace applies everywhere in the Rockies.
Bearsafe Food Storage Comparison Table
| Method | Weight/Convenience | Main Use Case |
|---|---|---|
| Bear Canister | Heavier/Most reliable (required in many parks) |
Backcountry camping/multi-night trips (all scented items inside) |
| Bare Bag/Ursack + Hanging Kit | Lighter/Easier to pack (but needs proper hanging technique) |
Trekking where canisters aren’t required (tie away from camp) |
The right food choices—and smart storage habits—make hiking in the Rockies safer and more enjoyable for everyone on the trail!